หลังจากที่เราได้ลองติดตั้ง .NET Core Web API with Swagger กันไปแล้ว ซึ่งเรายังไม่ได้ทำ Authentication ทำให้ใครก็สามารถเรียกใช้งานได้โดยไม่ต้องทำการตรวจสอบสิทธิ์ Authorization โดยเราจะมาทำ Authentication LDAP ด้วย JWT กัน
Requirement
Get Started
- ทำการติดตั้ง Nuget Package ผ่าน .NET CLI
# PS C:\web_api> dotnet add package Microsoft.AspNetCore.Authentication.JwtBearer --version 3.0.0
# PS C:\web_api> dotnet add package Novell.Directory.Ldap.NETStandard --version 3.0.0-beta- ทำการ Generate Secret Key บน WSL
# echo "SECRET_KEY" | sha256sum- ทำการกำหนด JWT Configuration ที่อยู่ในไฟล์ appsettings.Development.json
"Jwt": {
  "Key": "bf77e19b7f43c569f78f259328dd19f0915af6211964b088e1626814c36c716c",
  "Issuer": "WEBAPI",
  "Subject": "JWT Token Authentication",
  "Audience": "localhost",
  "ExpireDay": "1"
}- ทำการประกาศ StaticConfig สำหรับ Static Class ในไฟล์ Startup.cs
public Startup(IConfiguration configuration)
{
    Configuration = configuration;
    StaticConfig = configuration;
}
public IConfiguration Configuration { get; set; }
public static IConfiguration StaticConfig { get; private set; }
- ทำการสร้างไฟล์ AuthenticationExtension.cs ในโฟลเดอร์ Extensions
using System;
using System.Text;
using Microsoft.AspNetCore.Authentication.JwtBearer;
using Microsoft.Extensions.DependencyInjection;
using Microsoft.IdentityModel.Tokens;

namespace web_api.Extensions
{
    public static class AuthenticationExtension
    {
        public static void ConfigureAuthentication(this IServiceCollection services, IConfiguration Configuration)
        {
            services.AddAuthentication(JwtBearerDefaults.AuthenticationScheme).AddJwtBearer(options =>
            {
                options.TokenValidationParameters = new TokenValidationParameters
                {
                    // Use Data Notation no Hardcode JWT Claims
                    ValidateIssuer = true,
                    ValidIssuer = Startup.StaticConfig["Jwt:Issuer"],
                    ValidateAudience = true,
                    ValidAudience = Startup.StaticConfig["Jwt:Audience"],
                    ValidateLifetime = true,
                    ClockSkew = TimeSpan.Zero, // disable delay when token is expire
                    ValidateIssuerSigningKey = true,
                    IssuerSigningKey = new SymmetricSecurityKey(Encoding.UTF8.GetBytes(Startup.StaticConfig["Jwt:Key"]))
                };
            });
        }
    }
}- ทำการแก้ไขไฟล์ SwaggerExtension.cs ที่อยู่ในโฟลเดอร์ Extensions ให้ทำการ Authentication ด้วย JWT ก่อนถึงใช้งานได้
services.AddSwaggerGen(c =>
{
    ...
    var securitySchema = new OpenApiSecurityScheme
    {
        Description = "JWT Authorization header using the Bearer scheme. Example: \"Authorization: Bearer {token}\"",
        Name = "Authorization",
        In = ParameterLocation.Header,
        Type = SecuritySchemeType.Http,
        Scheme = "bearer",
        Reference = new OpenApiReference
        {
            Type = ReferenceType.SecurityScheme,
            Id = "Bearer"
        }
    };
    c.AddSecurityDefinition("Bearer", securitySchema);

    var securityRequirement = new OpenApiSecurityRequirement();
    securityRequirement.Add(securitySchema, new[] { "Bearer" });
    c.AddSecurityRequirement(securityRequirement);
    ...
});- ทำการ Enable Middleware ในคลาส Configure ที่อยู่ในไฟล์ Startup.cs โดยเรียงลำดับการ Serve ให้ถูกต้อง
public void Configure(IApplicationBuilder app, IWebHostEnvironment env)
{
    ...

    app.UseAuthentication();

    app.UseAuthorization();

...- ทำการ Authorize Controller ที่ต้องการให้ Authentication ก่อนใช้งาน
using Microsoft.AspNetCore.Authorization;

namespace web_api.Controllers
{
    [Route("api/[controller]")]
    [ApiController]
    [Authorize]
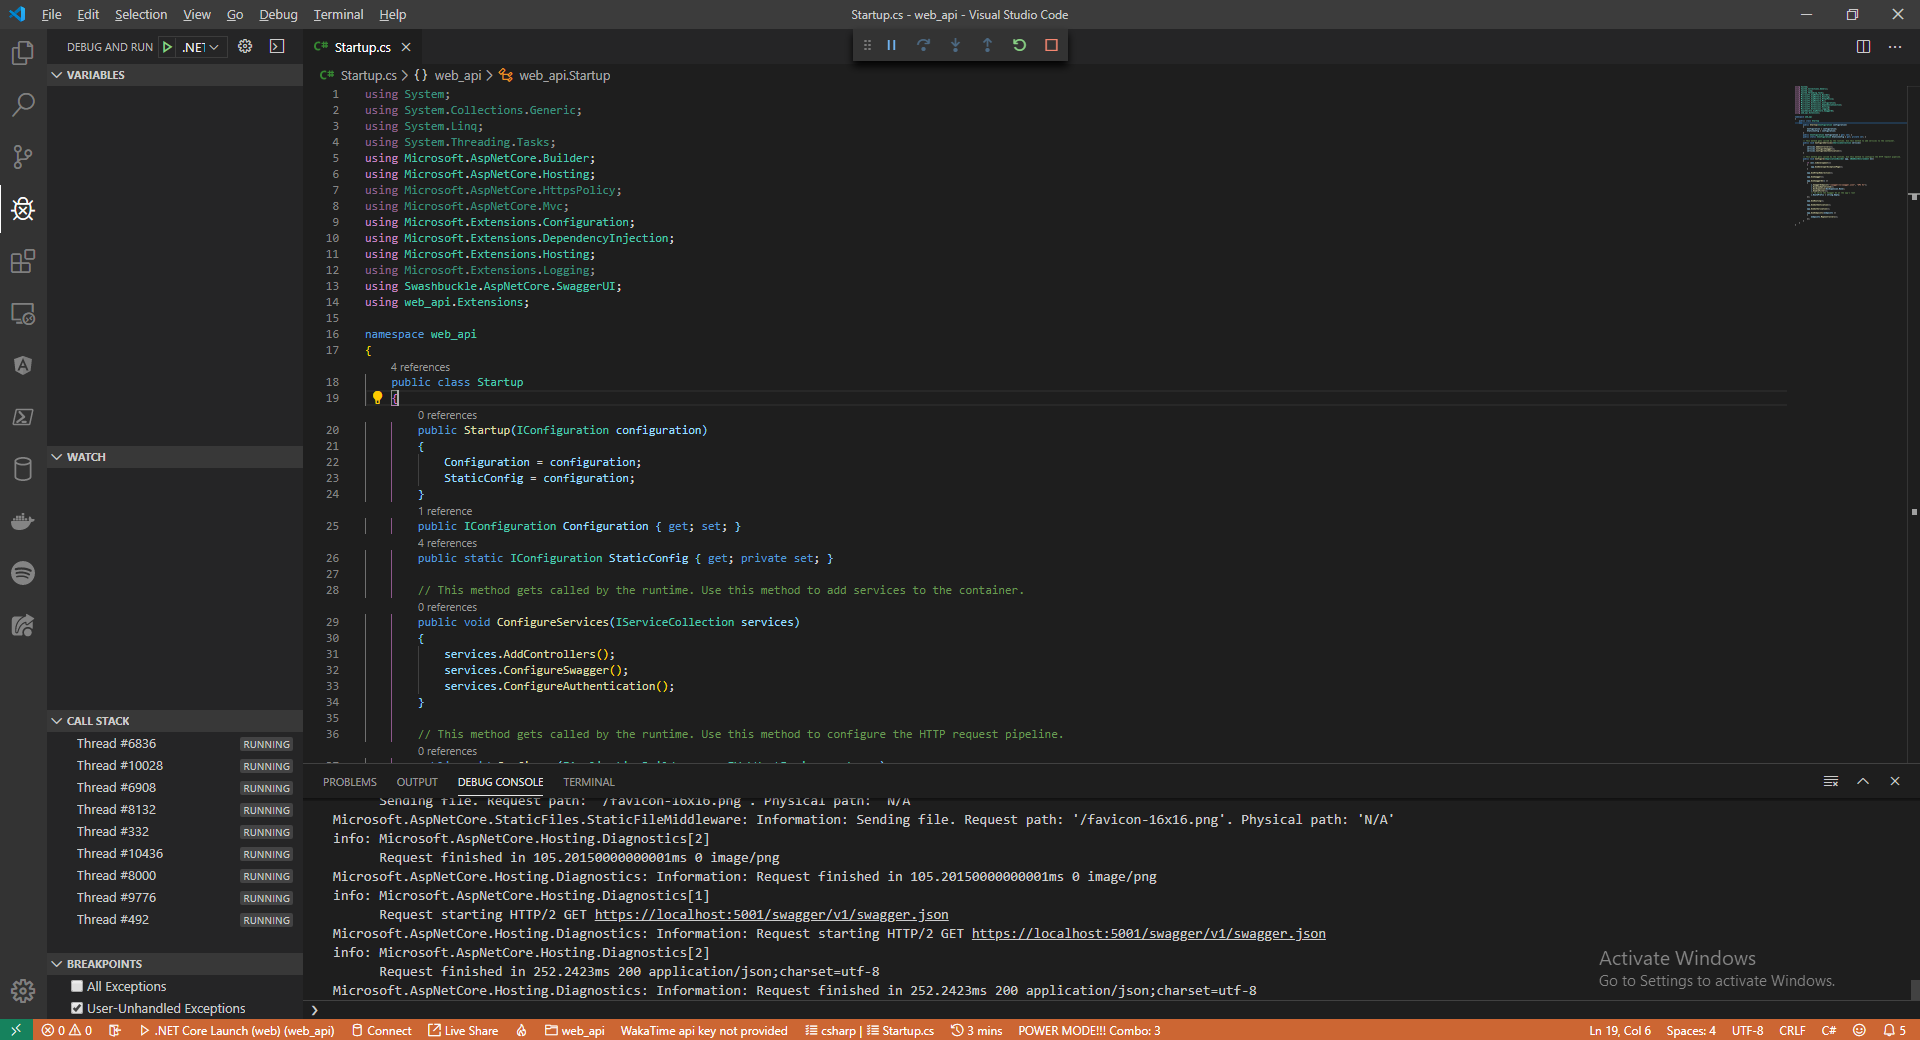
...- คลิก Debug แล้วเลือก Start Debugging
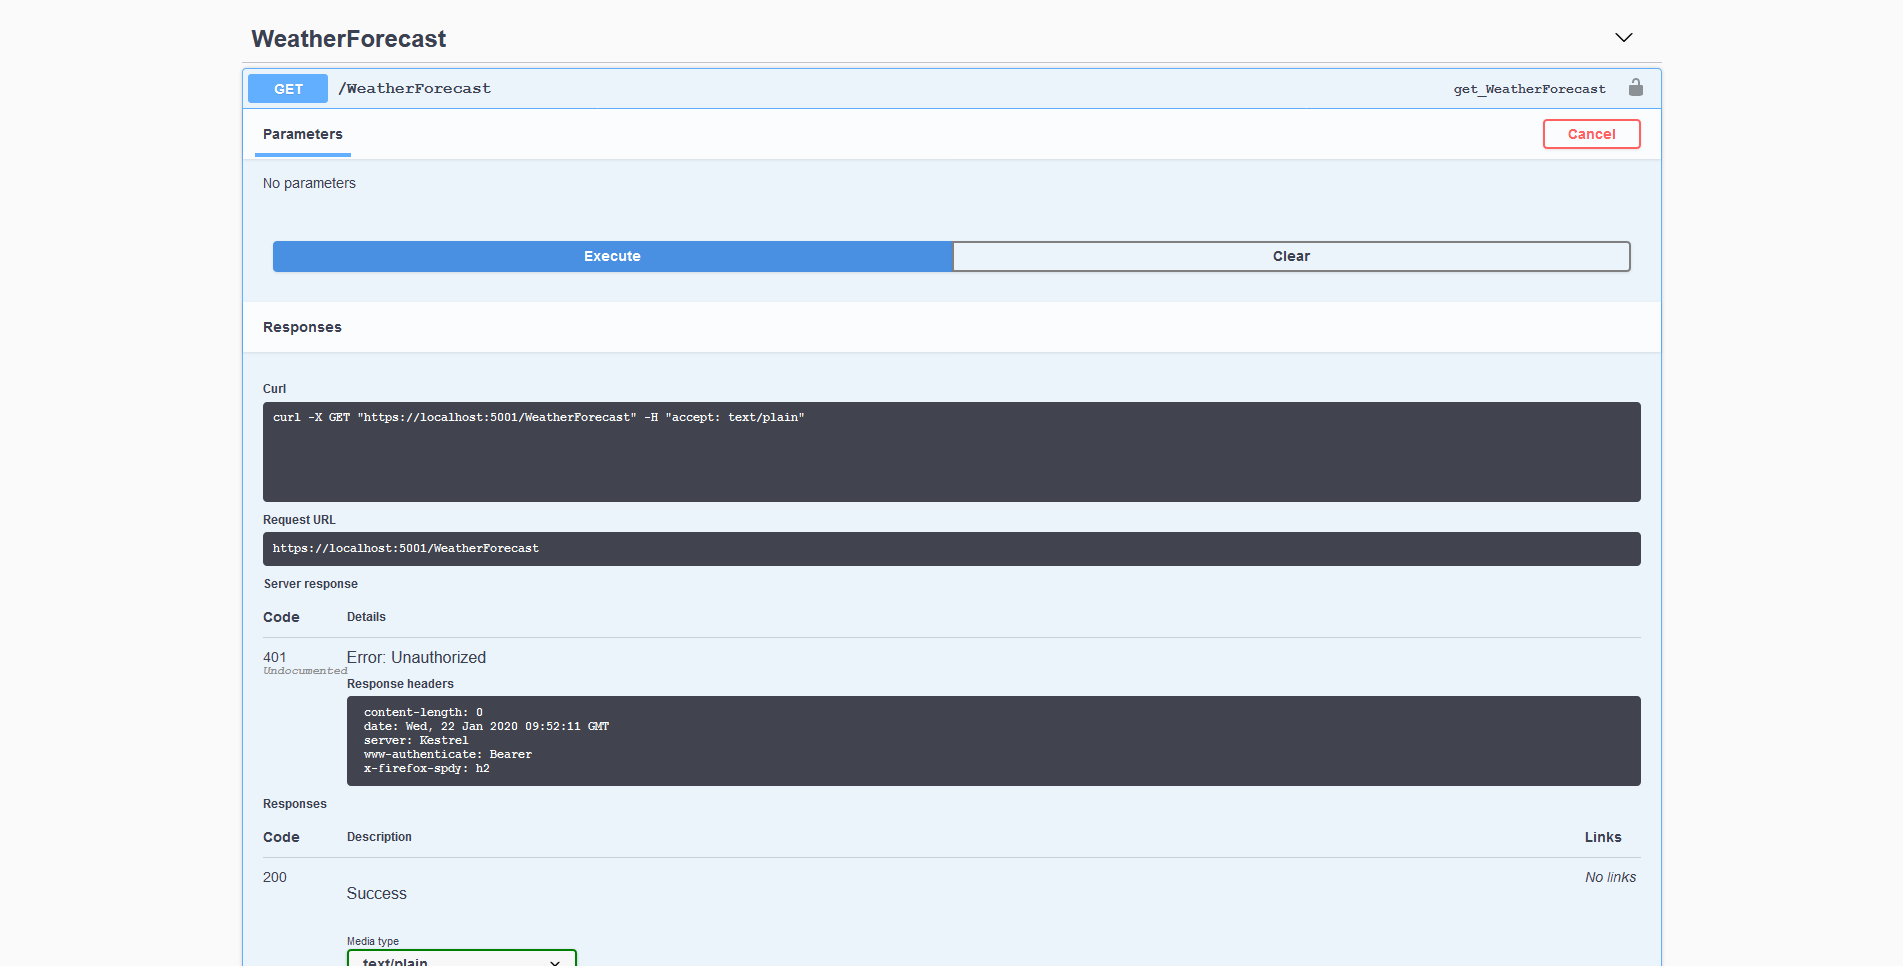
- ลองเข้าไปที่ https://localhost:5001/index.html แล้วคลิก Try it out -> Execute จะไม่สามารถใช้งานได้ โดยจะขึ้น Error ว่า Unauthorized
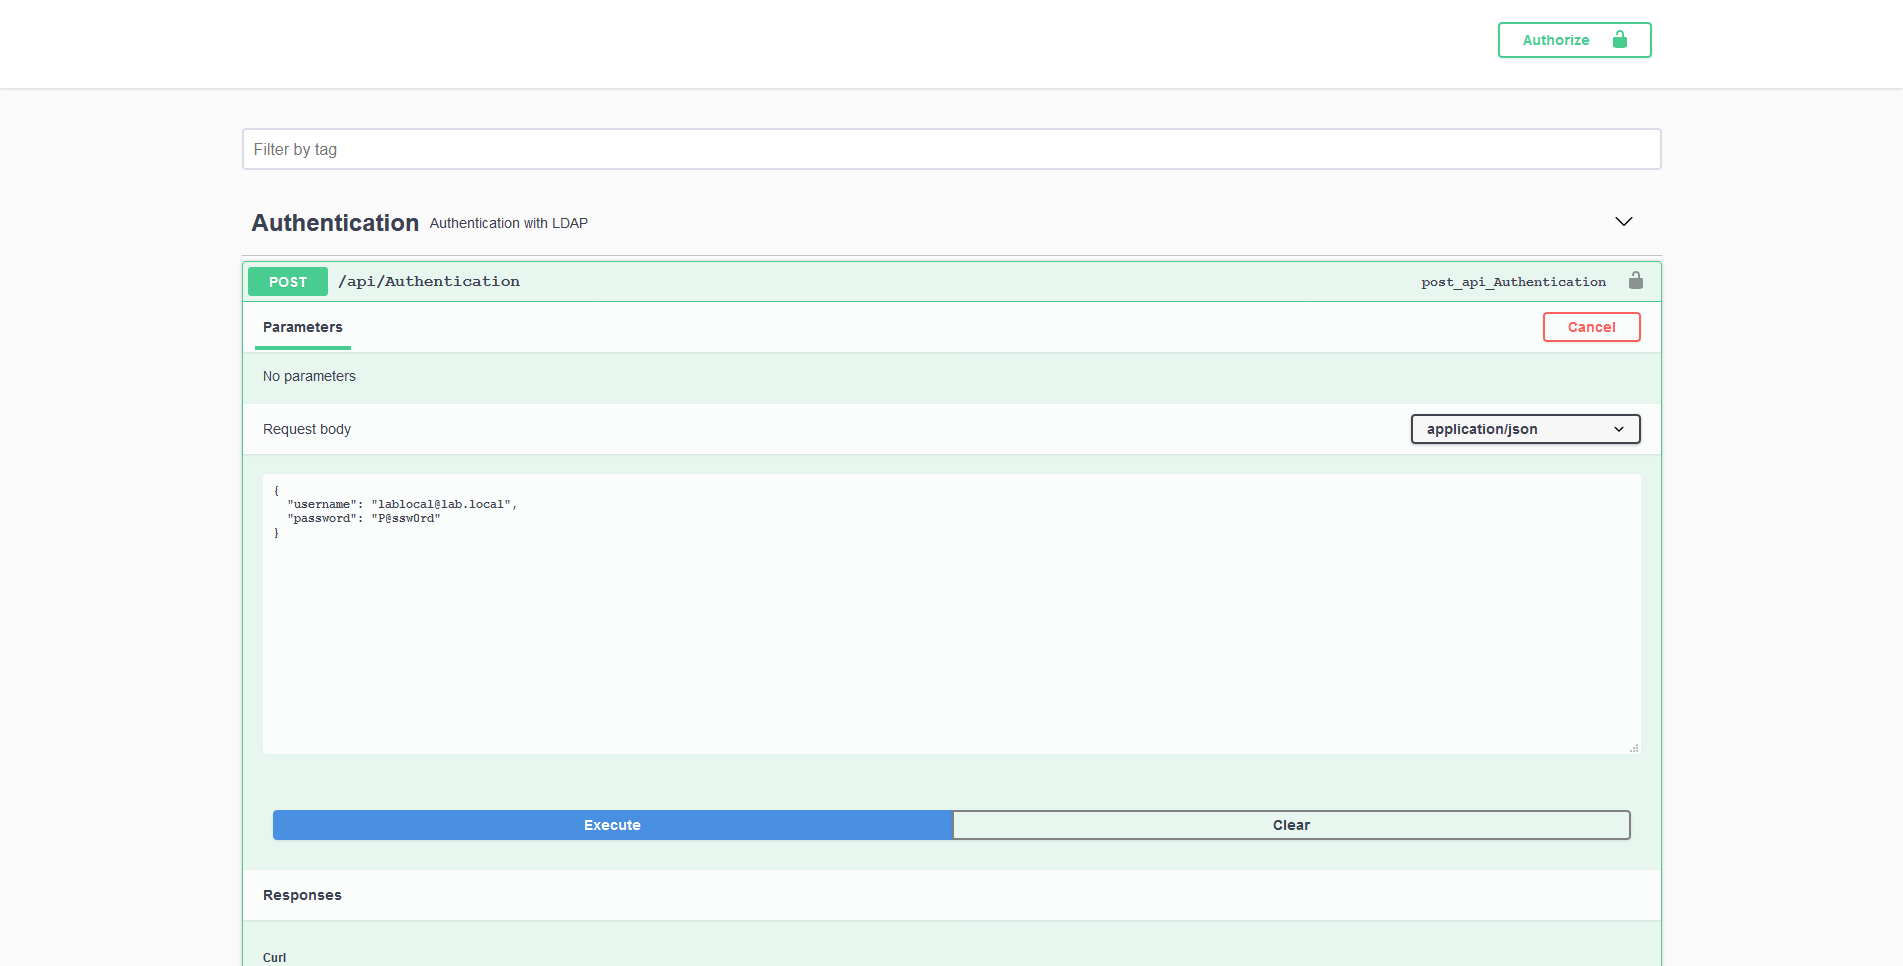
- ทำการกำหนด LDAP Configuration ที่อยู่ในไฟล์ appsettings.Development.json
"Ldap": {
    "Domain": "lab.local",
    "Port": 389,
    "BaseDn": "DC=lab,DC=local",
    "BindDn": "CN=lablocal,CN=Users,DC=lab,DC=local",
    "BindUsername": "lablocal@lab.local",
    "BindPassword": "P@ssw0rd"
}- ทำการสร้างโฟลเดอร์ Interfaces แล้วสร้างไฟล์ IAuthenticationRepository.cs
using System.Threading.Tasks;

namespace web_api.Interfaces
{
    public interface IAuthenticationRepository
    {
         Task Authentication(string username, string password);
    }
}- ทำการสร้างโฟลเดอร์ Services แล้วสร้างไฟล์ AuthenticationRepository.cs
using System;
using System.IdentityModel.Tokens.Jwt;
using System.Security.Claims;
using System.Text;
using System.Threading.Tasks;
using Microsoft.Extensions.Configuration;
using Microsoft.IdentityModel.Tokens;
using Novell.Directory.Ldap;
using web_api.Interfaces;

namespace web_api.Services
{
    public class AuthenticationRepository : IAuthenticationRepository
    {
        private readonly LdapConnection _connection;
        private readonly IConfiguration _configuration;

        public AuthenticationRepository(IConfiguration Configuration)
        {
            _connection = new LdapConnection();
            _configuration = Configuration;
        }

        public async Task Authentication(string username, string password)
        {
            var data = string.Empty;

            try
            {
                _connection.Connect(_configuration["Ldap:Domain"], LdapConnection.DefaultPort);
                _connection.Bind(LdapConnection.LdapV3, username, password);
                data = GenerateToken(username);
            }
            catch
            {
                data = null;
            }

            _connection.Disconnect();
            return data;
        }

        private string GenerateToken(string username)
        {
            var claims = new[] {
                new Claim(JwtRegisteredClaimNames.Sub, _configuration["Jwt:Subject"]),
                new Claim("email", username),
                new Claim(ClaimTypes.Role, "admin")
            };

            var expires = DateTime.Now.AddDays(Convert.ToDouble(_configuration["Jwt:ExpireDay"]));
            var key = new SymmetricSecurityKey(Encoding.UTF8.GetBytes(_configuration["Jwt:Key"]));
            var creds = new SigningCredentials(key, SecurityAlgorithms.HmacSha256);

            var token = new JwtSecurityToken(
                issuer: _configuration["Jwt:Issuer"],
                audience: _configuration["Jwt:Audience"],
                claims: claims,
                expires: expires,
                signingCredentials: creds
            );

            return new JwtSecurityTokenHandler().WriteToken(token);
        }
    }
}- ทำการสร้างโฟลเดอร์ Views แล้วสร้างไฟล์ AuthenticationView.cs
using System.ComponentModel.DataAnnotations;

namespace web_api.Views
{
    public class AuthenticationView
    {
        [Required]
        public string Username { get; set; }
        [Required]
        public string Password { get; set; }
    }
}- ทำการสร้างไฟล์ AuthenticationController.cs ในโฟลเดอร์ Controllers
using System;
using System.Collections.Generic;
using System.Linq;
using System.Threading.Tasks;
using Microsoft.AspNetCore.Mvc;
using Microsoft.Extensions.Logging;
using Swashbuckle.AspNetCore.Annotations;
using web_api.Interfaces;
using web_api.Views;

namespace web_api.Controllers
{
    [SwaggerTag("Authentication with LDAP")]
    [Route("api/[controller]")]
    [ApiController]
    public class AuthenticationController : ControllerBase
    {
        private readonly ILogger _logger;
        private readonly IAuthenticationRepository _authenticationRepository;

        public AuthenticationController(ILogger logger, IAuthenticationRepository authenticationRepository)
        {
            _logger = logger;
            _authenticationRepository = authenticationRepository;
        }

        [HttpPost]
        public async Task LoginLdap(AuthenticationView authenticationView)
        {
            try
            {
                var data = await _authenticationRepository.Authentication(authenticationView.Username, authenticationView.Password);

                if (data == null)
                {
                    return NotFound();
                }

                return Ok(new { status = true, message = data });
            }
            catch (Exception ex)
            {
                return StatusCode(500, new { status = false, message = ex });
            }
        }
    }
}- ทำการสร้างไฟล์ ScopedExtension.cs ในโฟลเดอร์ Extensions
using Microsoft.Extensions.DependencyInjection;
using web_api.Interfaces;
using web_api.Services;

namespace web_api.Extensions
{
    public static class ScopedExtension
    {
        public static void ConfigureSwagger(this IServiceCollection services)
        {
            services.AddScoped<IAuthenticationRepository, AuthenticationRepository>();
        }
    }
}- ทำการเรียกใช้คลาส ConfigureScoped ที่อยู่ในไฟล์ ScopedExtension.cs เข้ามาในคลาส ConfigureServices ที่อยู่ในไฟล์ Startup.cs
public void ConfigureServices(IServiceCollection services)
{
    services.AddControllers();
    services.ConfigureSwagger();
    services.ConfigureAuthentication();
    services.ConfigureScoped();
}- ลองเข้าไปที่ https://localhost:5001/index.html แล้วคลิก Authentication -> Try it out -> Execute แล้วทำการกรอก Username และ Password
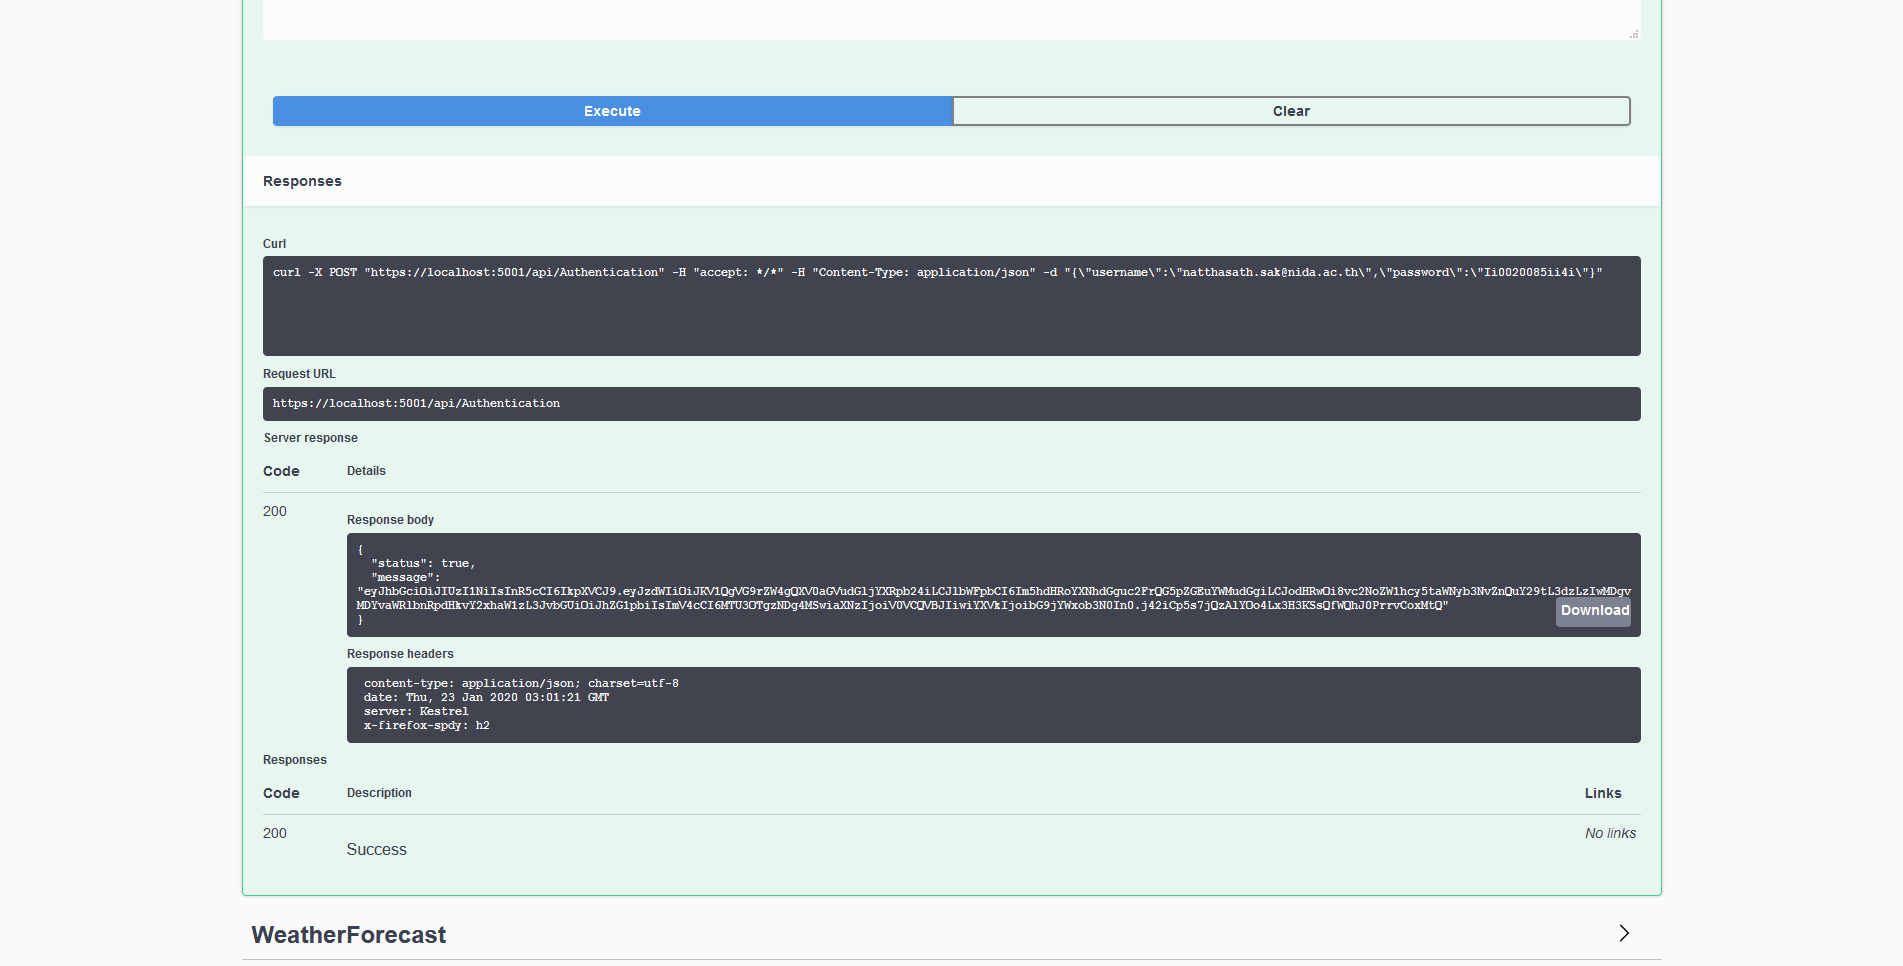
- ทำการคัดลอก Key
- คลิก Authorize แล้วใส่ Key ที่ได้แล้วคลิก Authorize
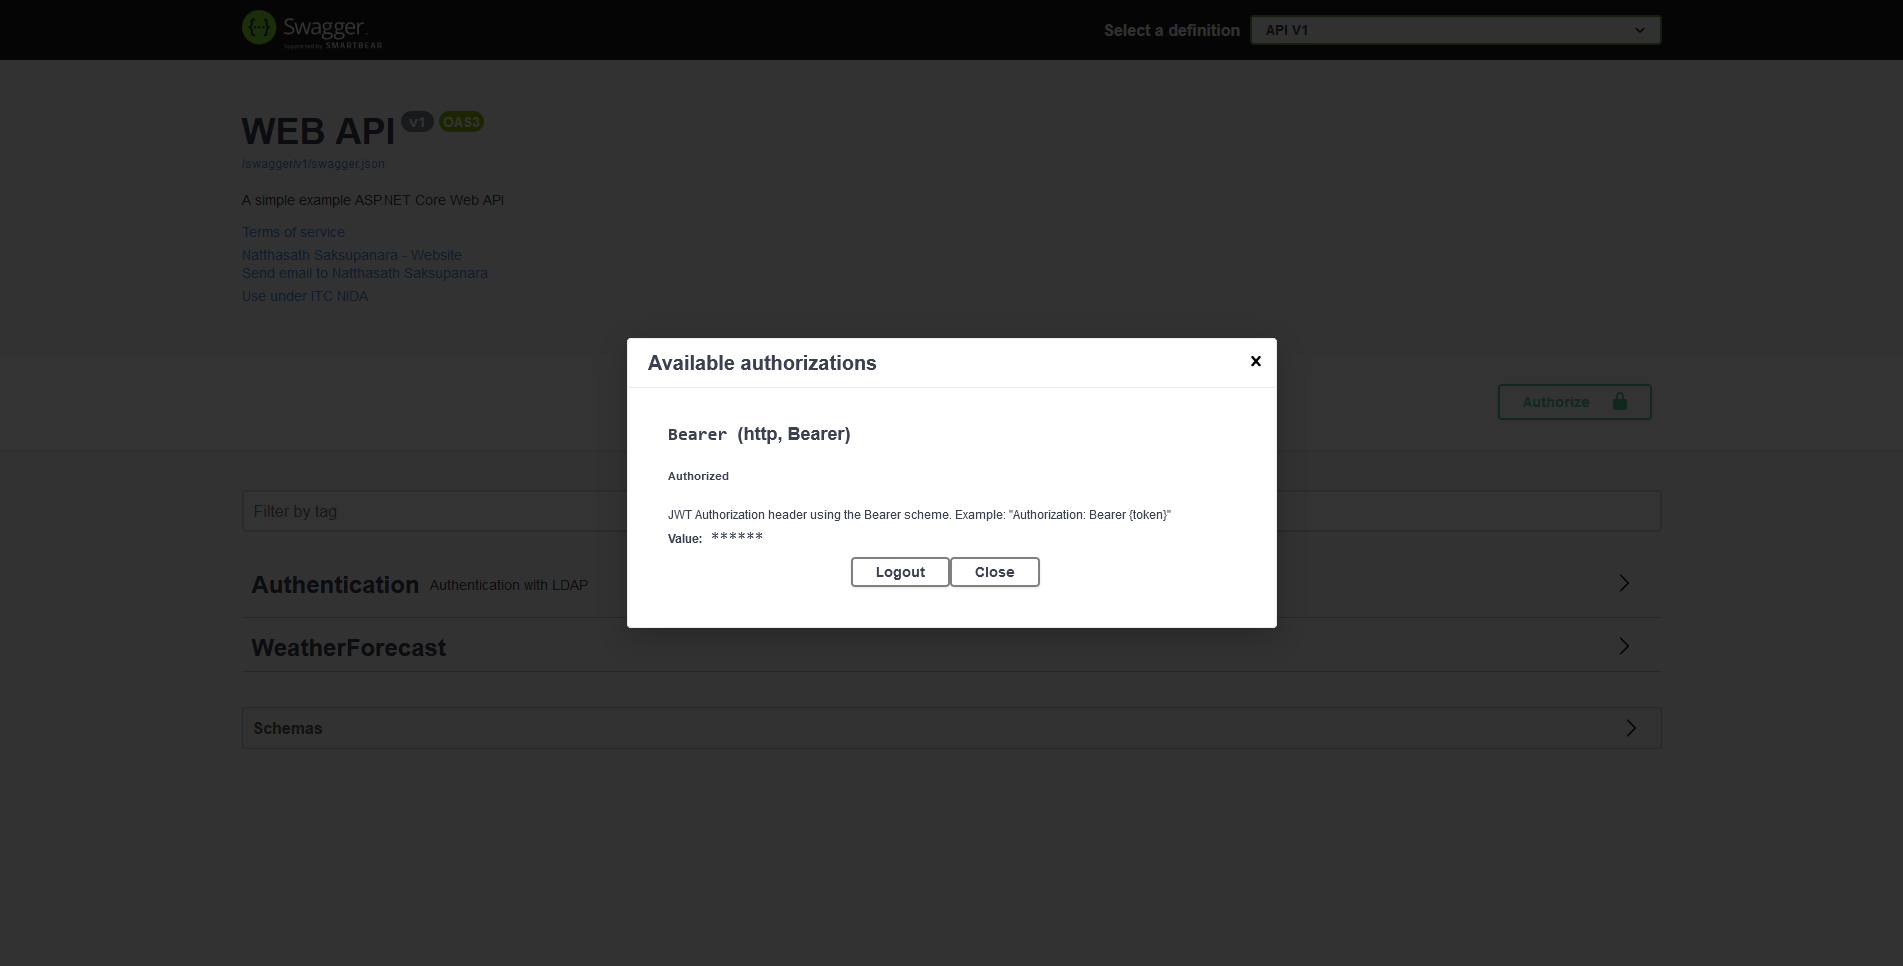
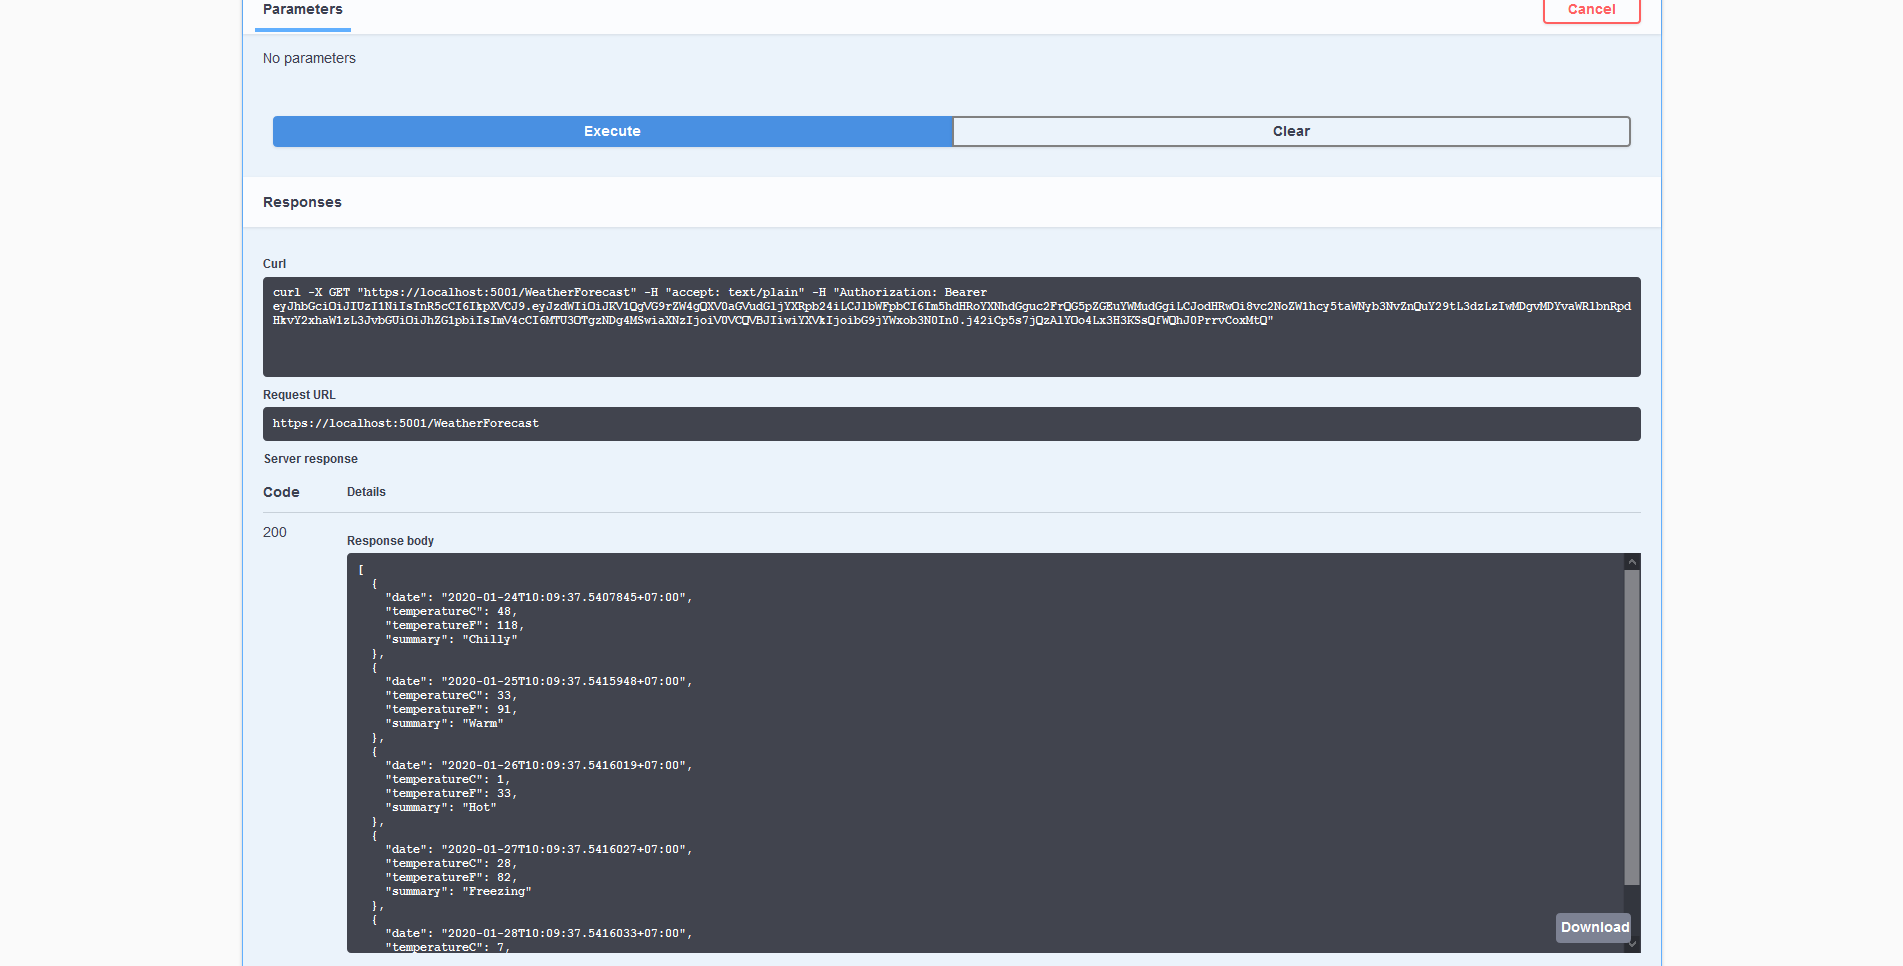
- ลองคลิก Try it out -> Execute อีกครั้ง จะสามารถใช้งานได้แล้ว
อ่านเพิ่มเติม : https://bit.ly/30RHsqL, https://bit.ly/2NRZjZi
Leave a Reply