หลายคนคงเคยได้ยินการนำ Machine Learning มาใช้ในการตรวจจับวัตถุอย่างใน Self Driving Car ซึ่งเราสามารถทำการสร้าง Object Detection Model สำหรับงานที่เราต้องการได้ โดยเลือกใช้ Tensorflow Model ซึ่งจะต้องทำการติดตั้ง Protocol Buffer ( protobuf ) ซึ่งเป็นภาษาที่ใช้จัดการกับข้อมูลเชิงโครงสร้างแบบ Serializing Structured Data เทียบกับภาษา XML แล้วจะมีขนาดเล็กกว่า และทำงานได้เร็วกว่า
Requirement
Download
Flow Create Model
- Gathering Data
- Labeling Data
- Generate TFRecords for Training
- Configuring Training
- Training Model
- Exporting Inference Graph
- Testing Object Datector
Get Started
STEP1
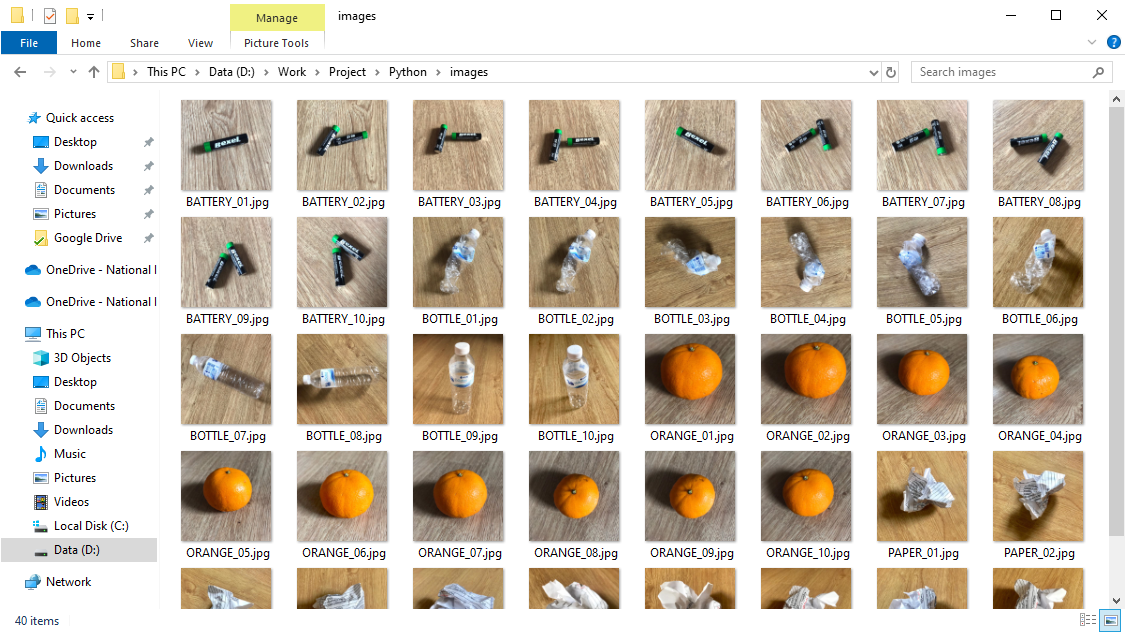
- ทำการถ่ายรูปวัตถุจำนวนหนึ่งจากกล้องโทรศัพท์มือถือ โดยควรให้พื้นหลังมีลักษณะแบบสุ่มและมีสภาพแสงที่แตกต่างกัน แล้วนำมาใส่ไว้ในโฟลเดอร์ images/ คำเตือนตั้งชื่อภาษาอังกฤษ
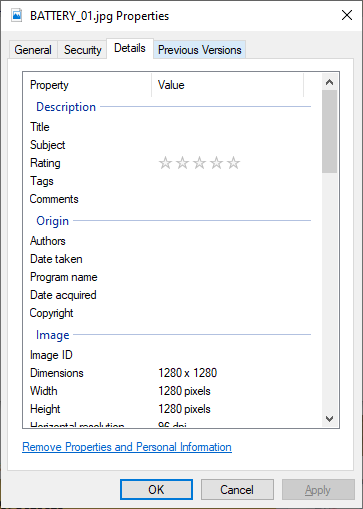
- ทำการตรวจสอบ Resolution ของภาพ โดยคลิกขวา Properties แล้วเลือก Detail จะเห็นว่าภาพที่ถ่ายจากโทรศัพท์มือถือมี Resolution ของภาพใหญ่ไป 1280 x 1280 เราจะทำการลดขนาดของภาพให้เหลือ Resolution 600 x 600
- ทำการสร้างไฟล์ transform_image_resolution.py สำหรับการลด Resolution ของภาพให้มีขนาดเล็กลง เพื่อทำให้การ Train ทำได้ไวขึ้น
from PIL import Image
import os
import argparse

def rescale_images(directory, size):
    for img in os.listdir(directory):
        im = Image.open(directory+img)
        im_resized = im.resize(size, Image.ANTIALIAS)
        im_resized.save(directory+img)

if __name__ == '__main__':
    parser = argparse.ArgumentParser(description="Rescale images")
    parser.add_argument('-d', '--directory', type=str, required=True, help='Directory containing the images')
    parser.add_argument('-s', '--size', type=int, nargs=2, required=True, metavar=('width', 'height'), help='Image size')
    args = parser.parse_args()
rescale_images(args.directory, args.size)- ทำการรัน transform_image_resolution.py
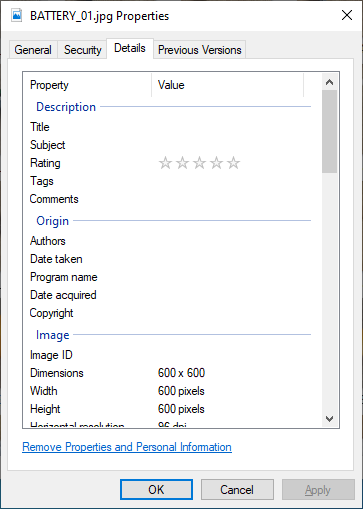
# C:\> python transform_image_resolution.py -d images/ -s 600 600- ทำการตรวจสอบ Resolution ของภาพอีกครั้งจะเห็นว่าได้ Resolution ของภาพเป็น 600 x 600 ตามที่เราต้องการแล้ว
- ทำการแบ่งภาพออกเป็น Train 80 ( images/train ) กับ Test 20 ( images/test )

STEP2
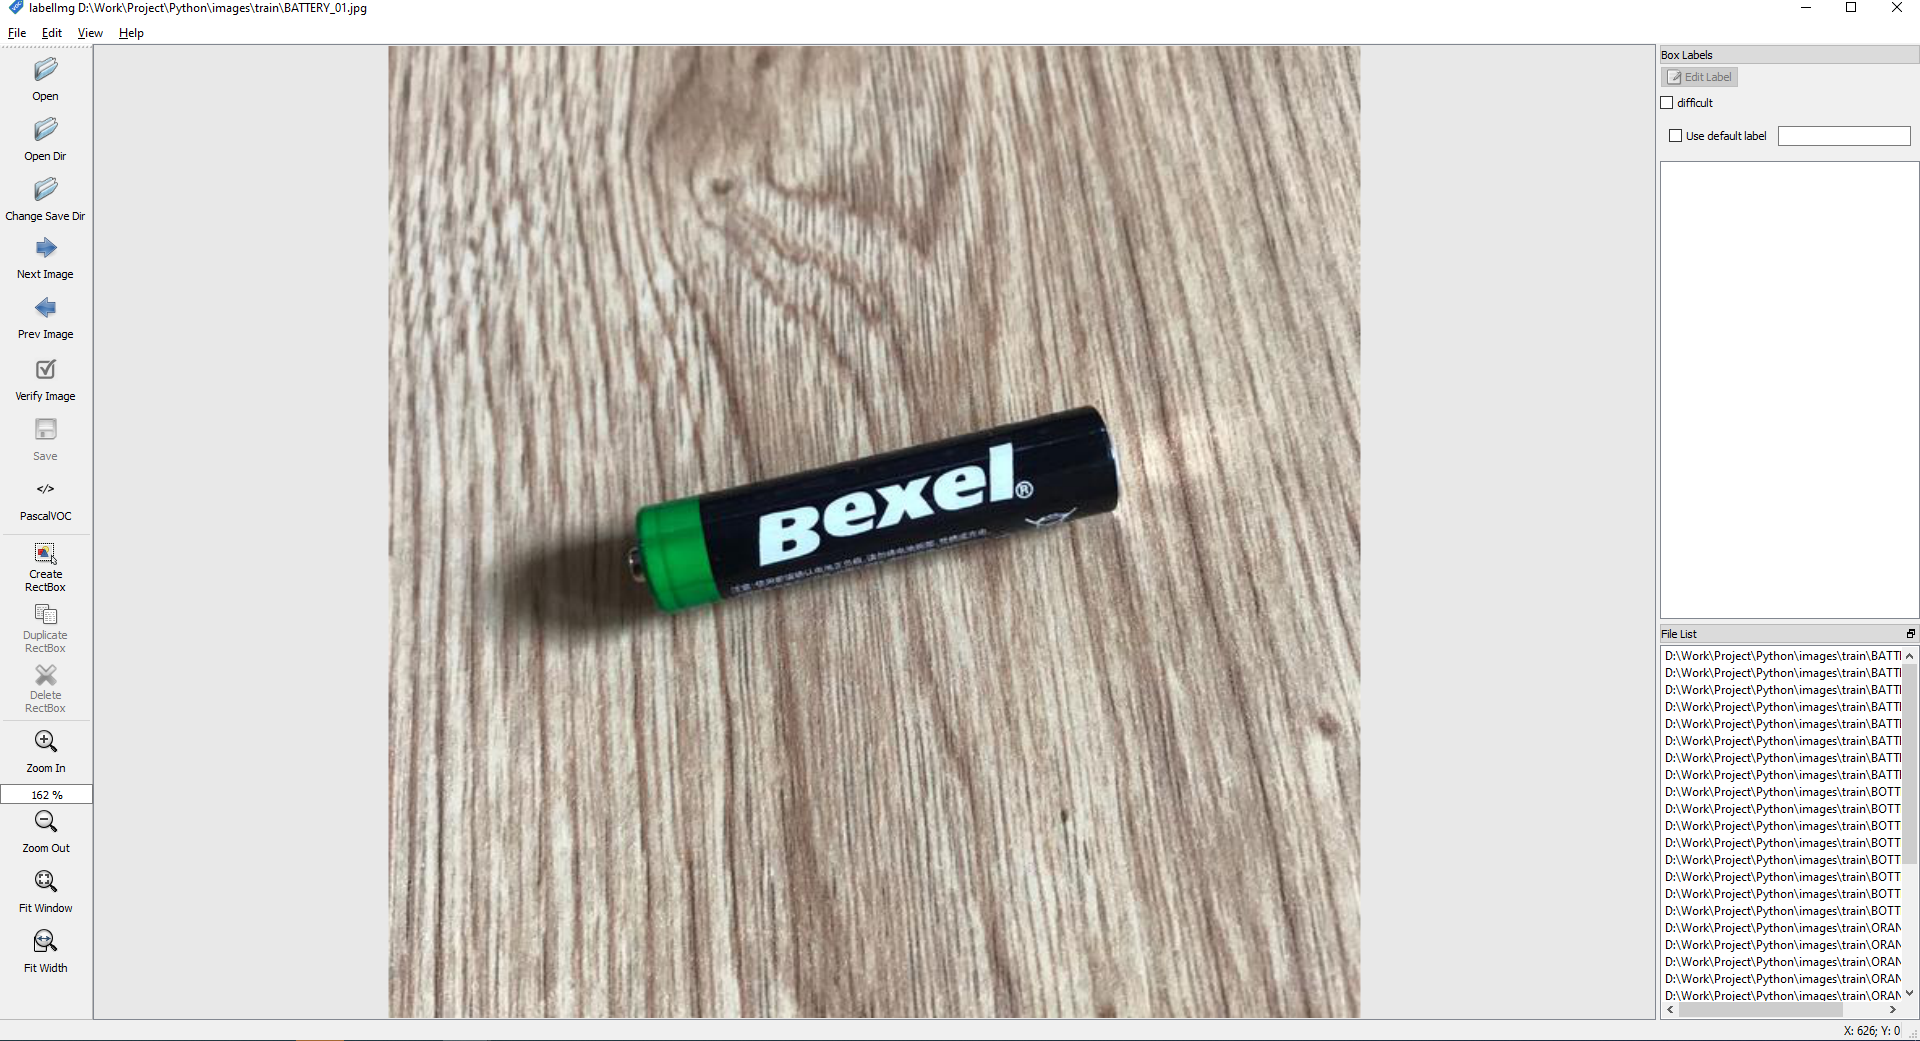
- ทำการสร้าง Label ด้วย LabelImg โดยคลิก Open Dir แล้วเลือกโฟลเดอร์ train/
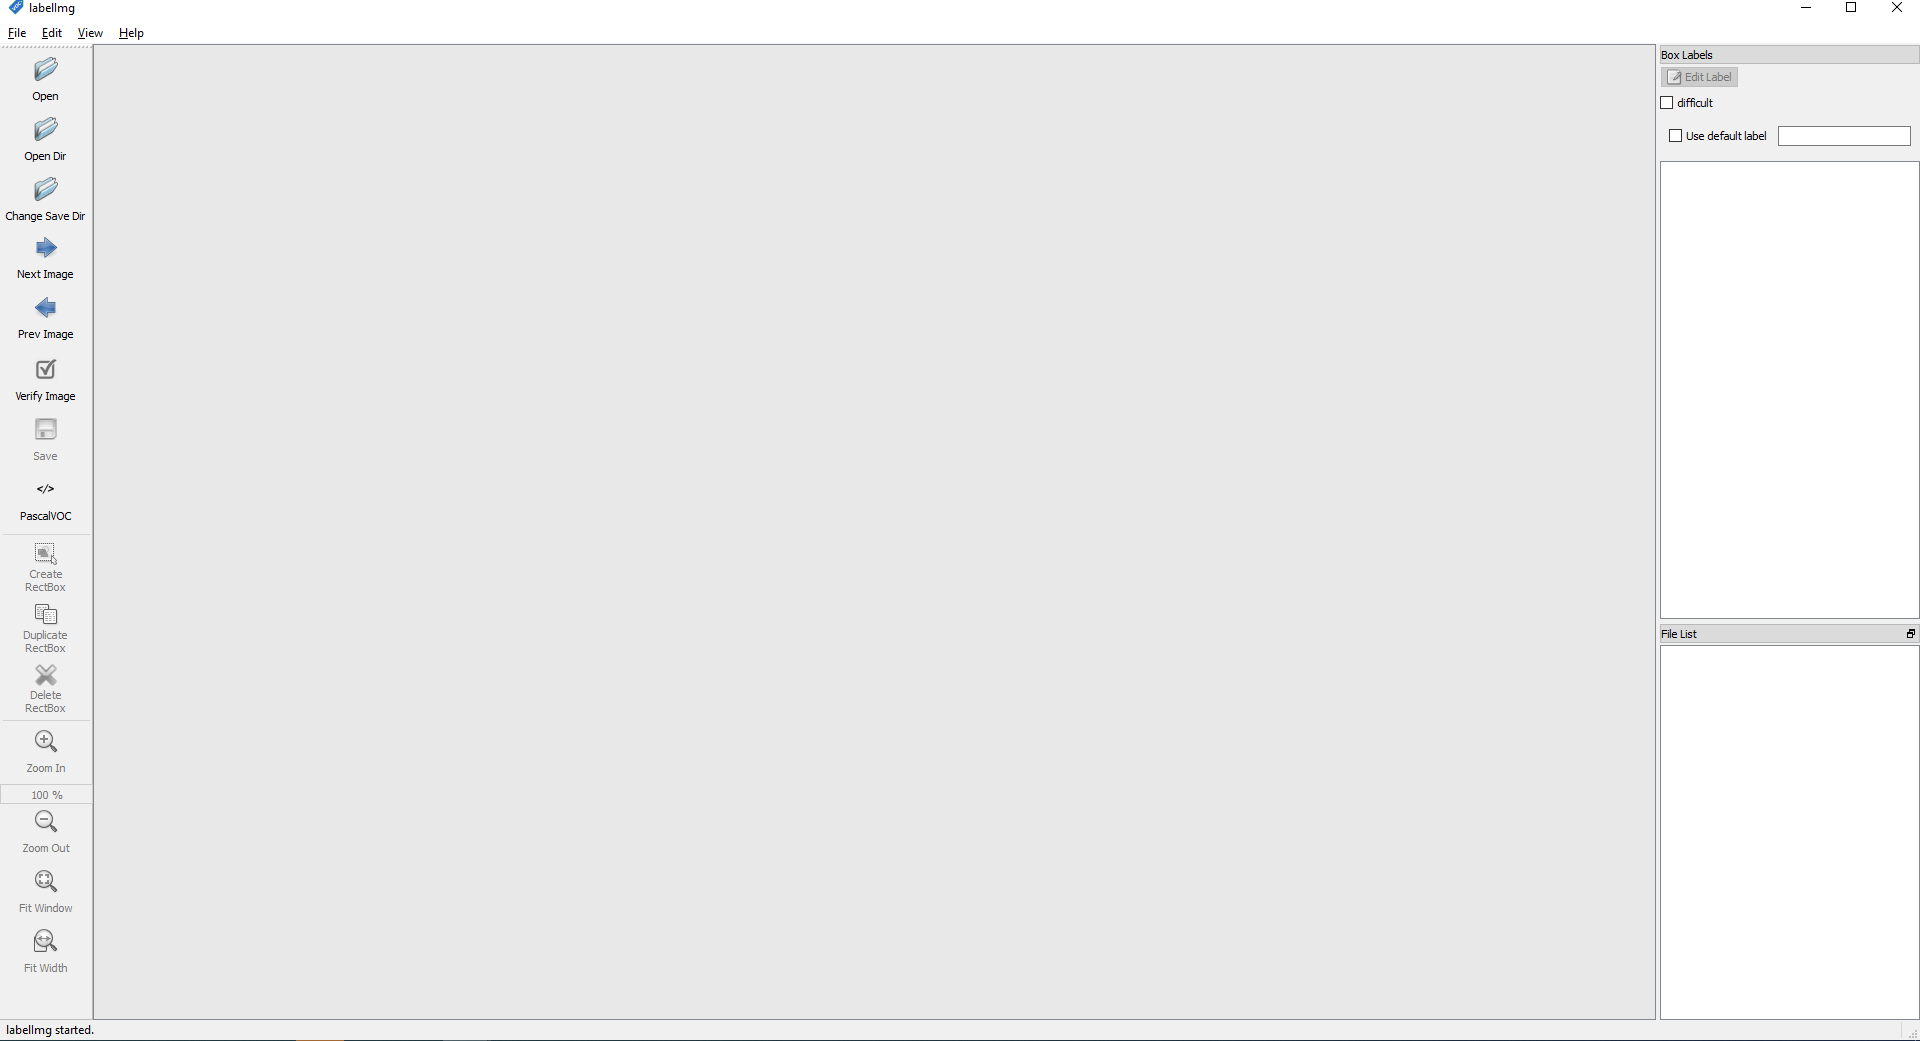
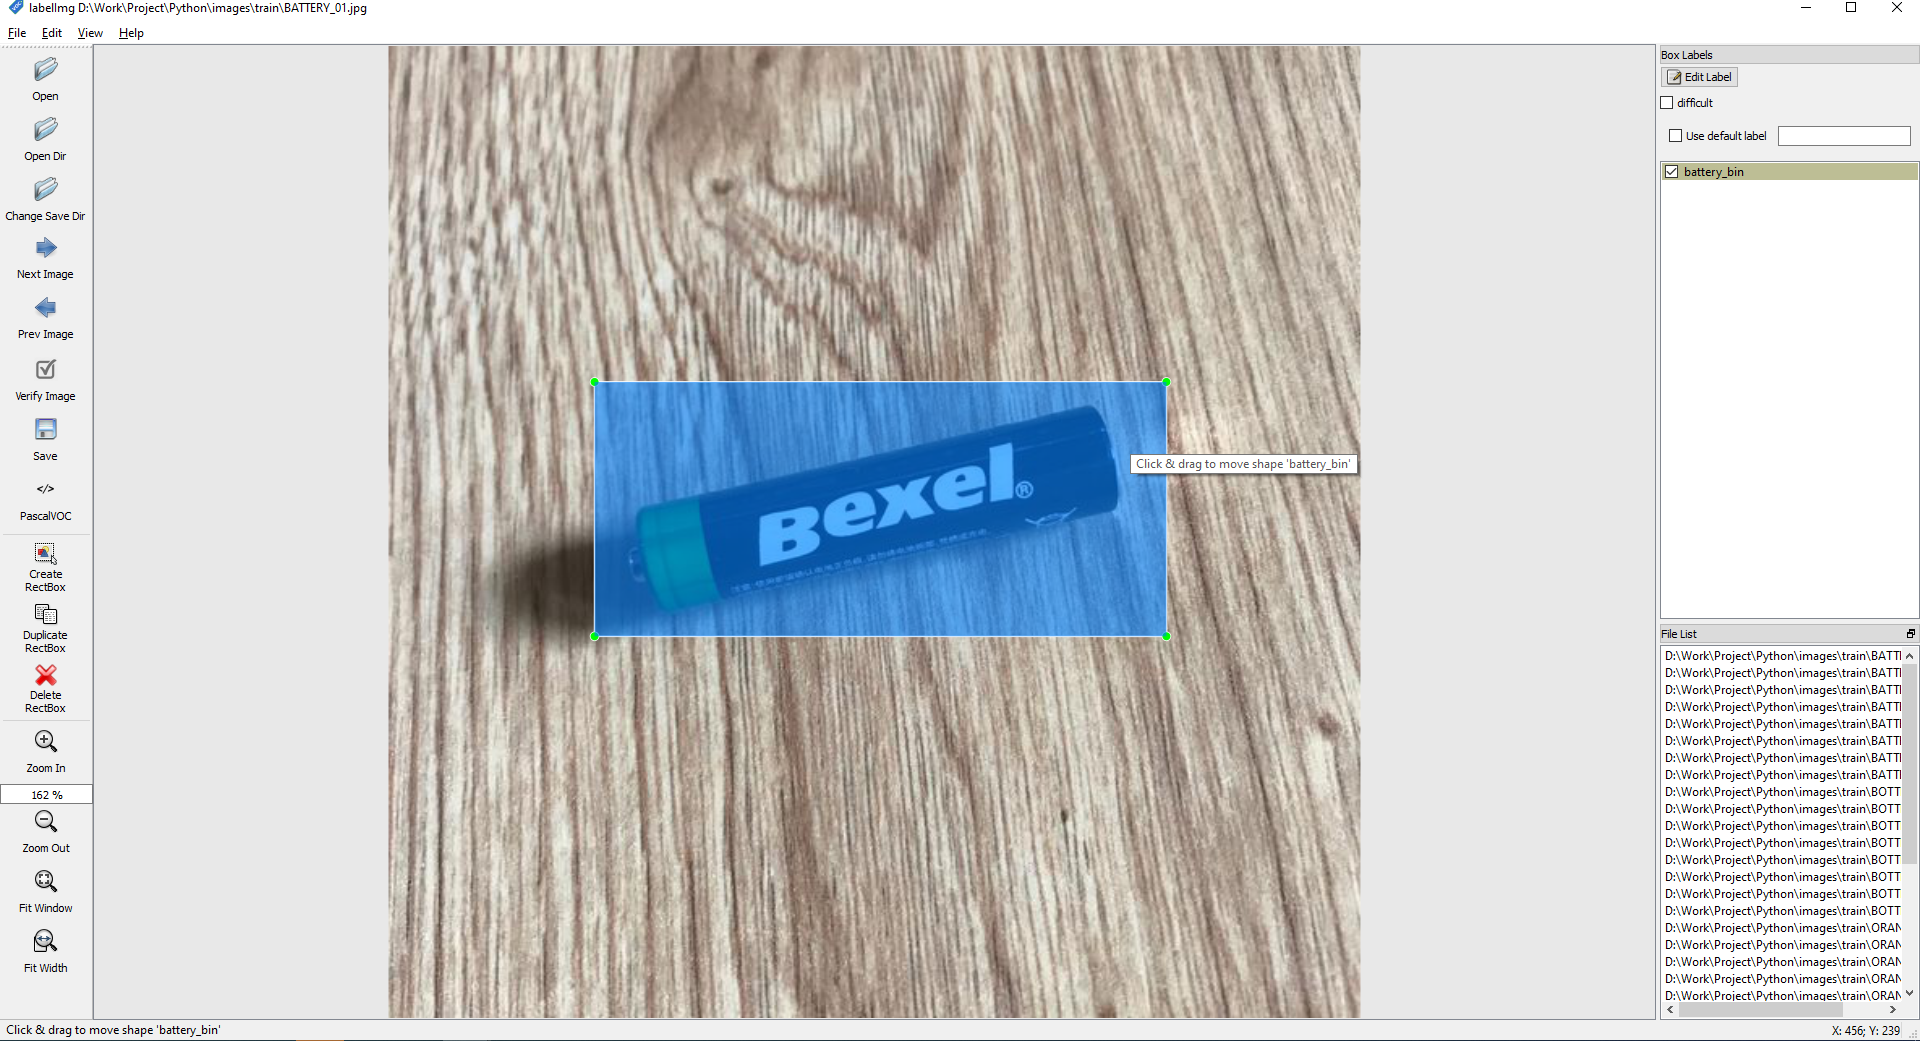
- ทำการเลือกรูปภาพ คลิกขวา Create ReactBox แล้วทำการวาดกรอบเพื่อกำหนดวัตถุ
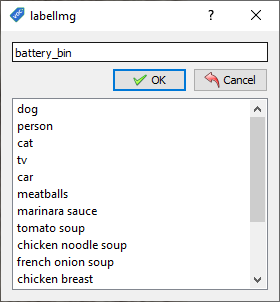
- ทำการกำหนดชื่อของ Label Image แล้วคลิก OK คำเตือนตั้งชื่อภาษาอังกฤษ
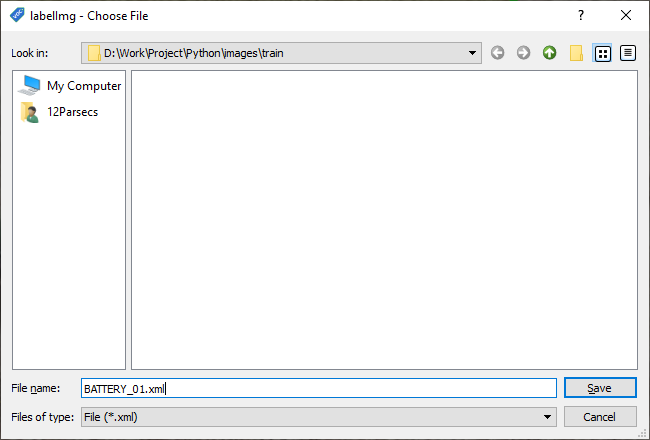
- ทำการกำหนดชื่อไฟล์ของ Image และ Label ให้เหมือนกัน แล้วคลิก Save
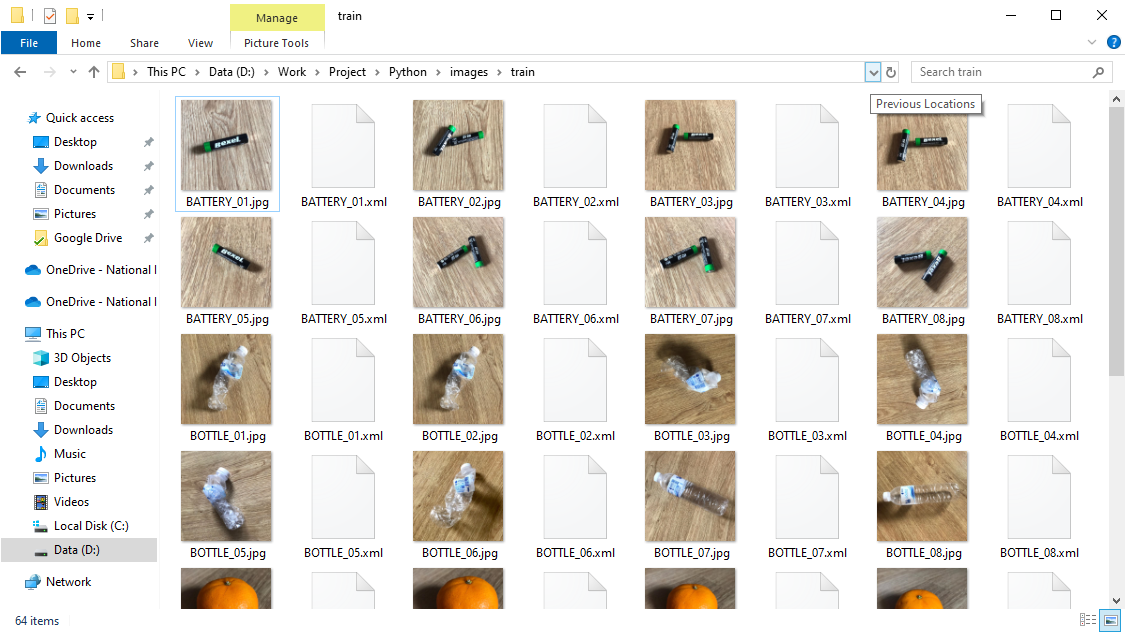
- ทำให้ครบทุกไฟล์ในโฟลเดอร์ train/ และ test/
- จะได้ไฟล์ที่อยู่ในโฟล์เดอร์ train/ และโฟลเดอร์ test/ ประมาณนี้
- ทำการสร้างไฟล์ xml_to_csv.py สำหรับการแปลงไฟล์ XML ที่ได้จากการทำ Label เป็นไฟล์ CSV
import os
import glob
import pandas as pd
import xml.etree.ElementTree as ET

def xml_to_csv(path):
    xml_list = []
    for xml_file in glob.glob(path + '/*.xml'):
        tree = ET.parse(xml_file)
        root = tree.getroot()
        for member in root.findall('object'):
            value = (root.find('filename').text,
                     int(root.find('size')[0].text),
                     int(root.find('size')[1].text),
                     member[0].text,
                     int(member[4][0].text),
                     int(member[4][1].text),
                     int(member[4][2].text),
                     int(member[4][3].text)
                     )
            xml_list.append(value)
    column_name = ['filename', 'width', 'height', 'class', 'xmin', 'ymin', 'xmax', 'ymax']
    xml_df = pd.DataFrame(xml_list, columns=column_name)
    return xml_df

def main():
    for folder in ['train', 'test']:
        image_path = os.path.join(os.getcwd(), ('images/' + folder))
        xml_df = xml_to_csv(image_path)
        xml_df.to_csv(('images/'+folder+'_labels.csv'), index=None)
        print('Successfully converted xml to csv.')
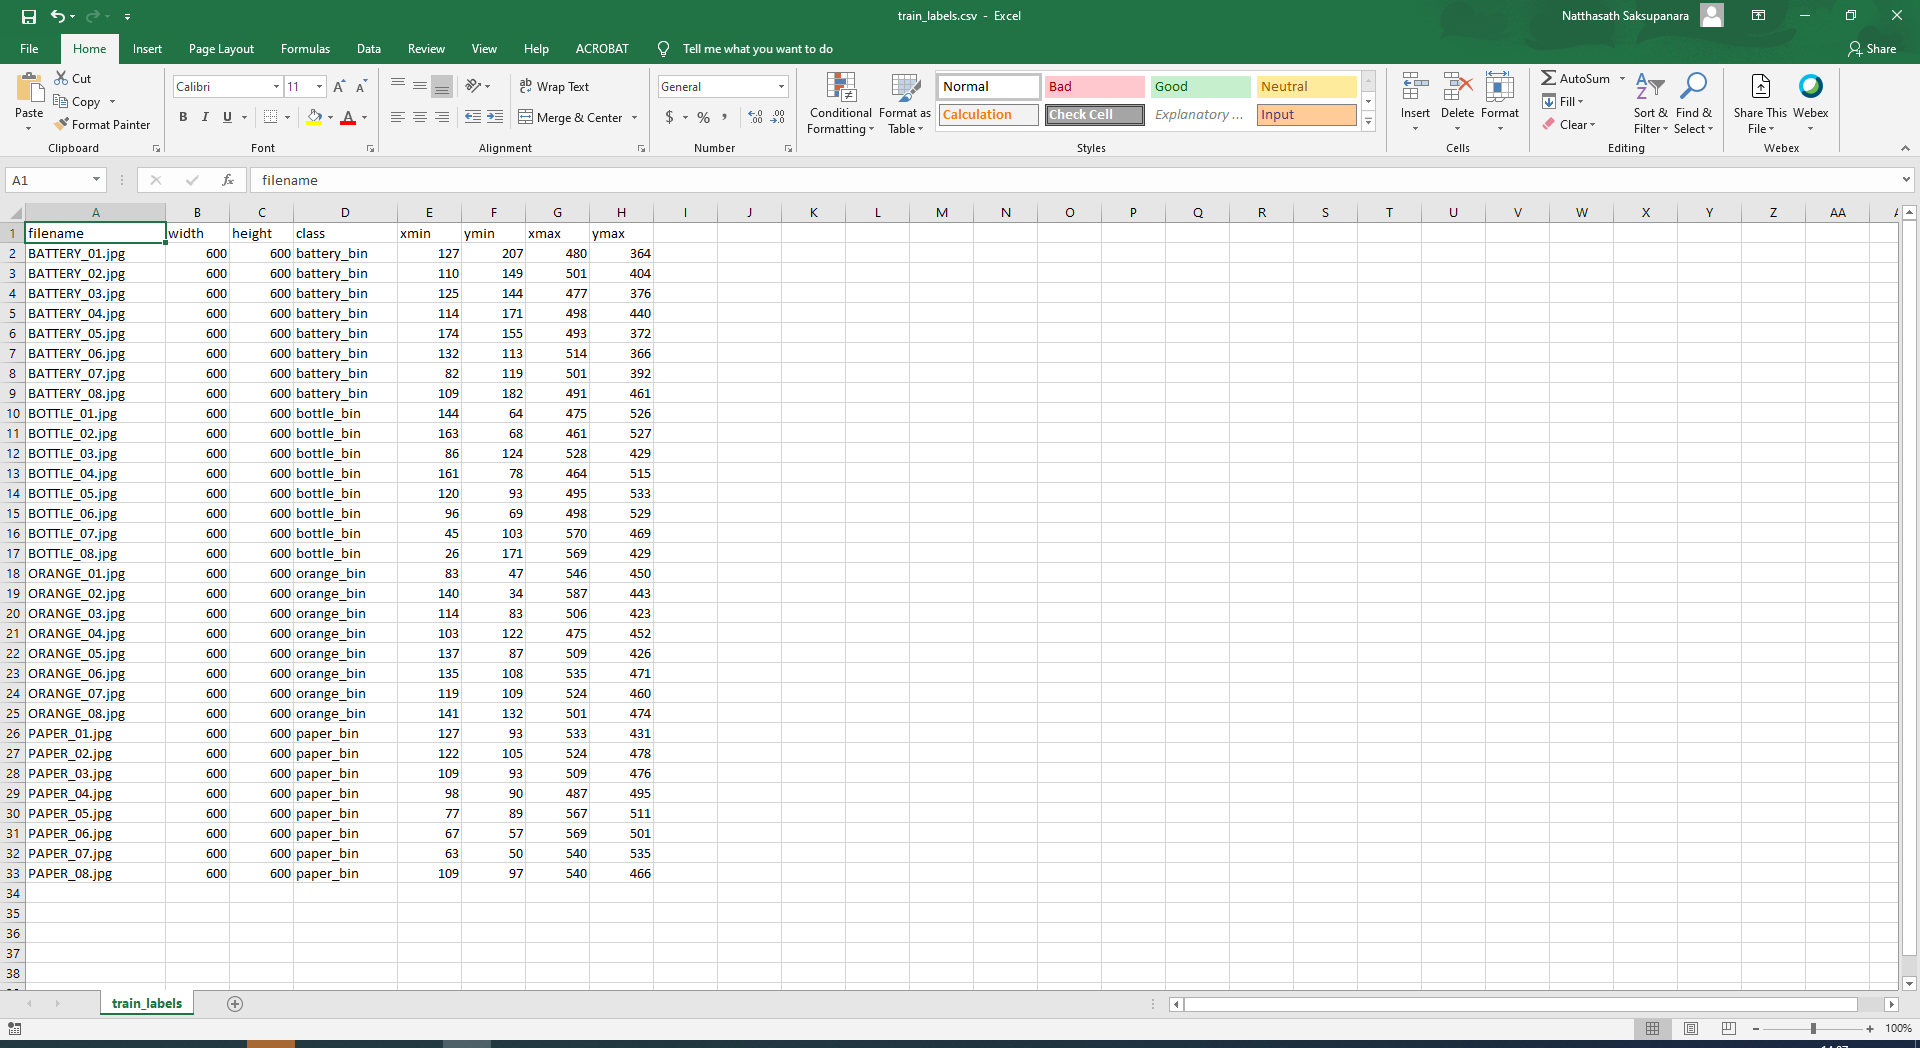
main()- ทำการรัน xml_to_csv.py
# C:\> python xml_to_csv.py- จะได้ไฟล์ CSV ประมาณนี้
- ทำการสร้างไฟล์ generate_tfrecord.py สำหรับการสร้าง TFRecords เพื่อแปลงข้อมูลจากการทำ Label ให้สามารถนำไป Train ด้วย Object Detector ได้
"""
Usage:
  # From tensorflow/models/
  # Create train data:
  python generate_tfrecord.py --csv_input=data/train_labels.csv  --output_path=train.record

  # Create test data:
  python generate_tfrecord.py --csv_input=data/test_labels.csv  --output_path=test.record
"""
from __future__ import division
from __future__ import print_function
from __future__ import absolute_import

import os
import io
import pandas as pd
import tensorflow as tf

from PIL import Image
from object_detection.utils import dataset_util
from collections import namedtuple, OrderedDict

flags = tf.app.flags
flags.DEFINE_string('csv_input', '', 'Path to the CSV input')
flags.DEFINE_string('output_path', '', 'Path to output TFRecord')
flags.DEFINE_string('image_dir', '', 'Path to images')
FLAGS = flags.FLAGS

# TO-DO replace this with label map
def class_text_to_int(row_label):
    if row_label == 'basketball':
        return 1
    elif row_label == 'shirt':
        return 2
    elif row_label == 'shoe':
        return 3
    else:
        return None

def split(df, group):
    data = namedtuple('data', ['filename', 'object'])
    gb = df.groupby(group)
    return [data(filename, gb.get_group(x)) for filename, x in zip(gb.groups.keys(), gb.groups)]

def create_tf_example(group, path):
    with tf.gfile.GFile(os.path.join(path, '{}'.format(group.filename)), 'rb') as fid:
        encoded_jpg = fid.read()
    encoded_jpg_io = io.BytesIO(encoded_jpg)
    image = Image.open(encoded_jpg_io)
    width, height = image.size

    filename = group.filename.encode('utf8')
    image_format = b'jpg'
    xmins = []
    xmaxs = []
    ymins = []
    ymaxs = []
    classes_text = []
    classes = []

    for index, row in group.object.iterrows():
        xmins.append(row['xmin'] / width)
        xmaxs.append(row['xmax'] / width)
        ymins.append(row['ymin'] / height)
        ymaxs.append(row['ymax'] / height)
        classes_text.append(row['class'].encode('utf8'))
        classes.append(class_text_to_int(row['class']))

    tf_example = tf.train.Example(features=tf.train.Features(feature={
        'image/height': dataset_util.int64_feature(height),
        'image/width': dataset_util.int64_feature(width),
        'image/filename': dataset_util.bytes_feature(filename),
        'image/source_id': dataset_util.bytes_feature(filename),
        'image/encoded': dataset_util.bytes_feature(encoded_jpg),
        'image/format': dataset_util.bytes_feature(image_format),
        'image/object/bbox/xmin': dataset_util.float_list_feature(xmins),
        'image/object/bbox/xmax': dataset_util.float_list_feature(xmaxs),
        'image/object/bbox/ymin': dataset_util.float_list_feature(ymins),
        'image/object/bbox/ymax': dataset_util.float_list_feature(ymaxs),
        'image/object/class/text': dataset_util.bytes_list_feature(classes_text),
        'image/object/class/label': dataset_util.int64_list_feature(classes),
    }))
    return tf_example

def main(_):
    writer = tf.python_io.TFRecordWriter(FLAGS.output_path)
    path = os.path.join(FLAGS.image_dir)
    examples = pd.read_csv(FLAGS.csv_input)
    grouped = split(examples, 'filename')
    for group in grouped:
        tf_example = create_tf_example(group, path)
        writer.write(tf_example.SerializeToString())

    writer.close()
    output_path = os.path.join(os.getcwd(), FLAGS.output_path)
    print('Successfully created the TFRecords: {}'.format(output_path))

if __name__ == '__main__':
tf.app.run()- ทำการแก้ไขไฟล์ generate_tfrecord.py
# TO-DO replace this with label map
def class_text_to_int(row_label):
    if row_label == 'battery_bin':
        return 1
    elif row_label == 'bottle_bin':
        return 2
    elif row_label == 'orange_bin':
        return 3
    elif row_label == 'paper_bin':
        return 4
    else:
return None- ทำการรัน generate_tfrecord.py
# C:\> python generate_tfrecord.py --csv_input=images\train_labels.csv --image_dir=images\train --output_path=train.record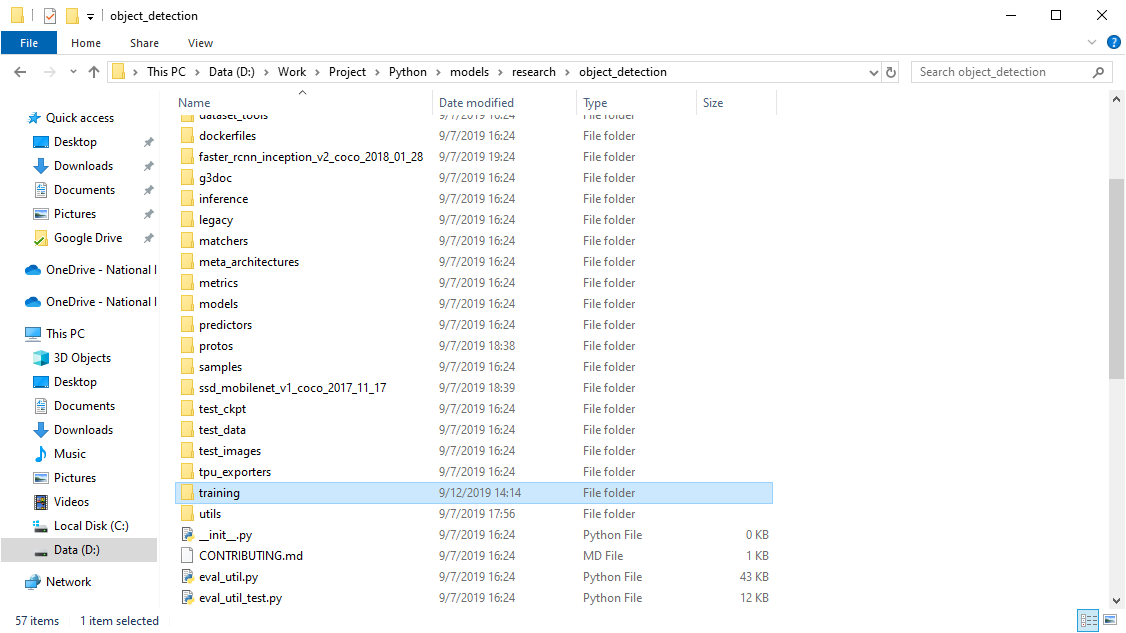
# C:\> python generate_tfrecord.py --csv_input=images\test_labels.csv --image_dir=images\test --output_path=test.record- ทำการสร้างโฟลเดอร์ models/research/object_detection/training
- ทำการสร้างไฟล์ training/labelmap.pbtxt
item {
    id: 1
    name: 'battery_bin'
}

item {
    id: 2
    name: 'bottle_bin'
}

item {
    id: 3
    name: 'orange_bin'
}

item {
    id: 4
    name: 'paper_bin'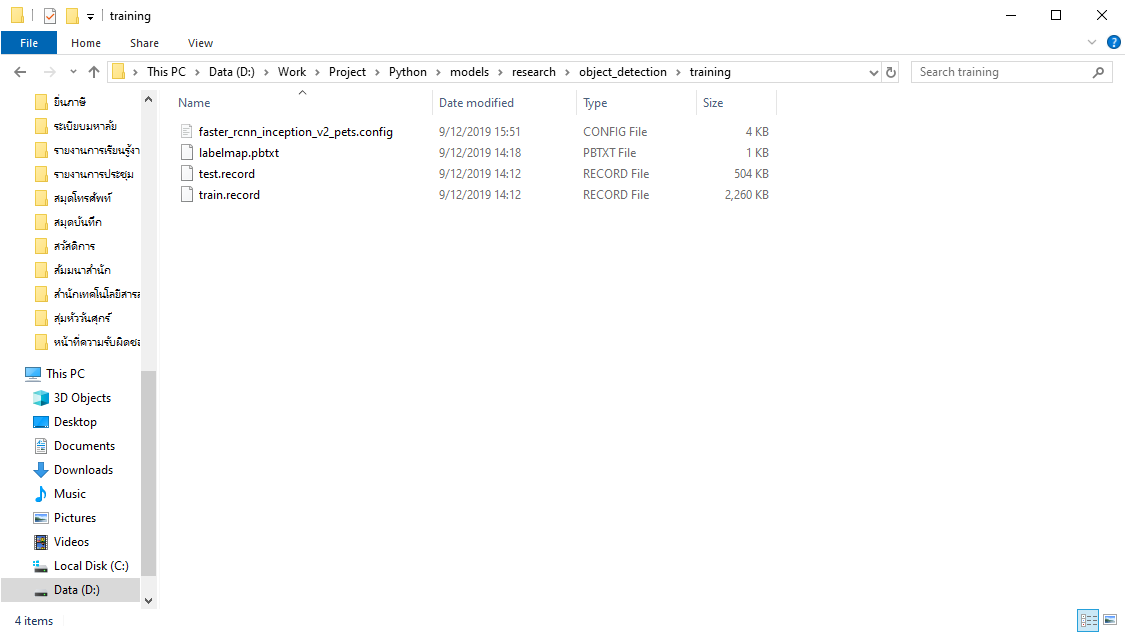
}- ทำการคัดลอกไฟล์ samples/configs/faster_rcnn_inception_v2_pets.config มาไว้ในโฟลเดอร์ training/

- ทำการคัดลอกไฟล์ train.record และ test.record มาไว้ในโฟลเดอร์ models/research/object_detection/training/
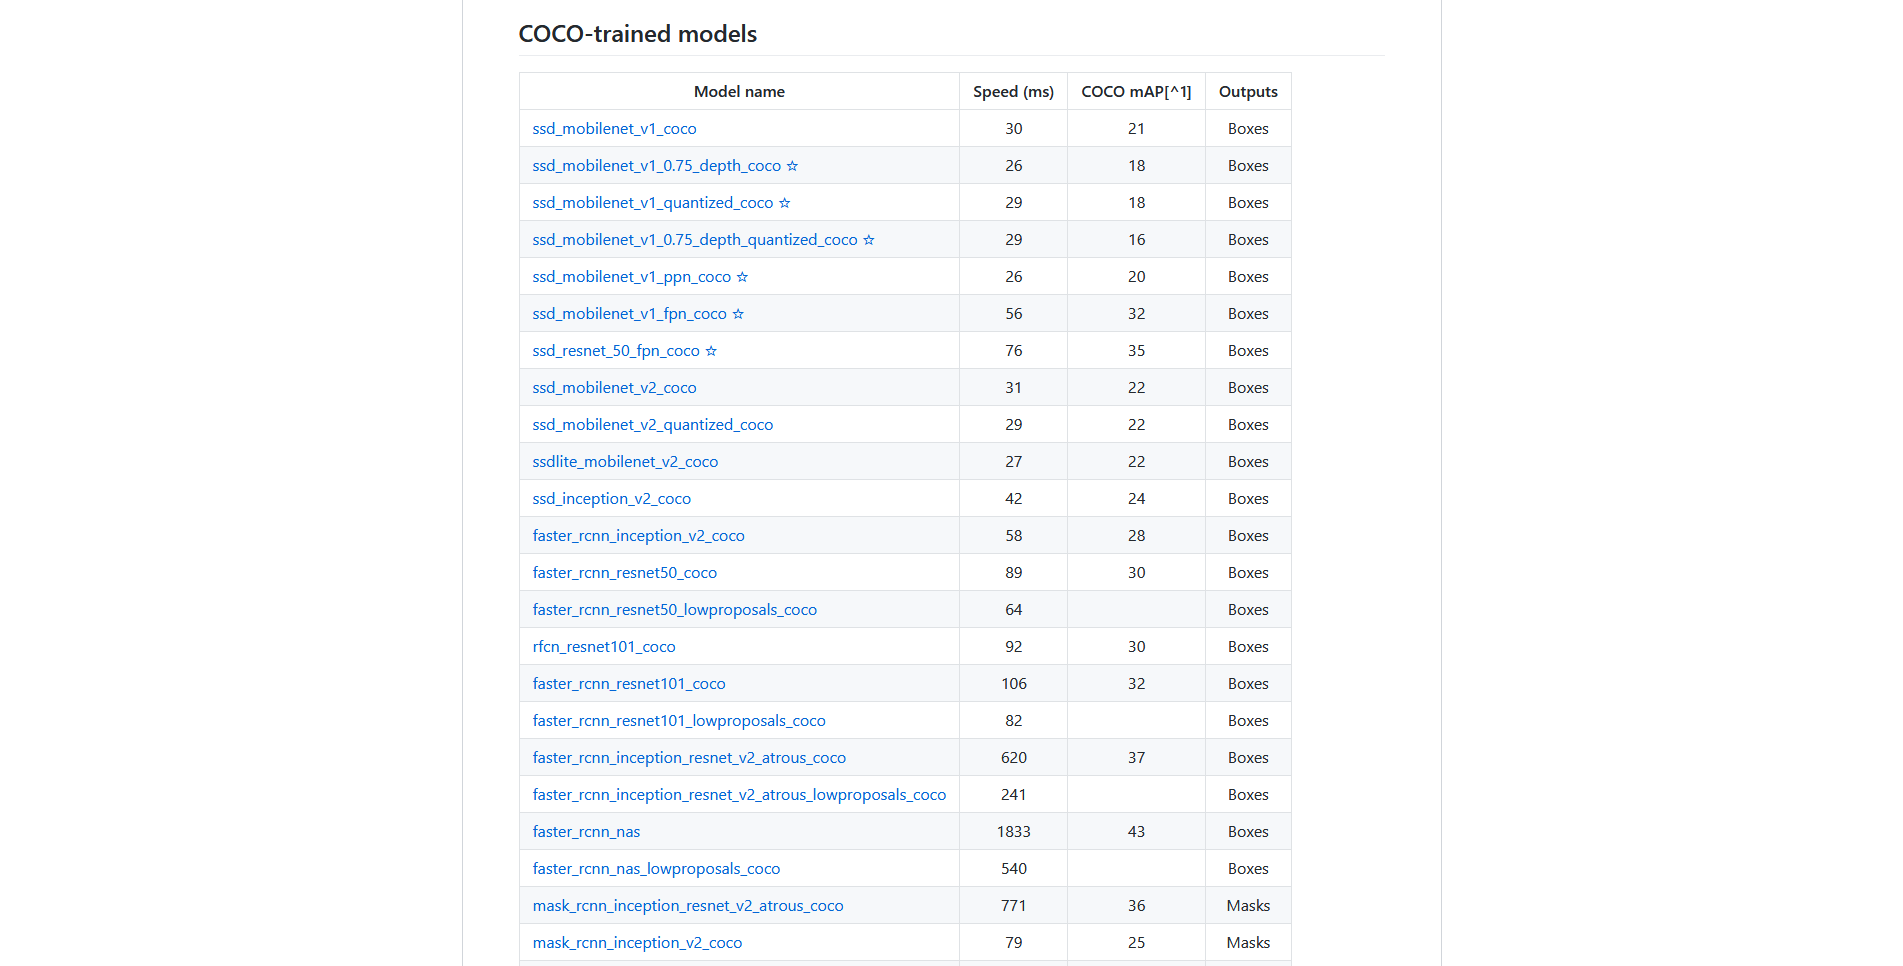
- ทำการดาวน์โหลด COCO-Trained Models โดยเลือกเป็น faster_rcnn_inception_v2_coco
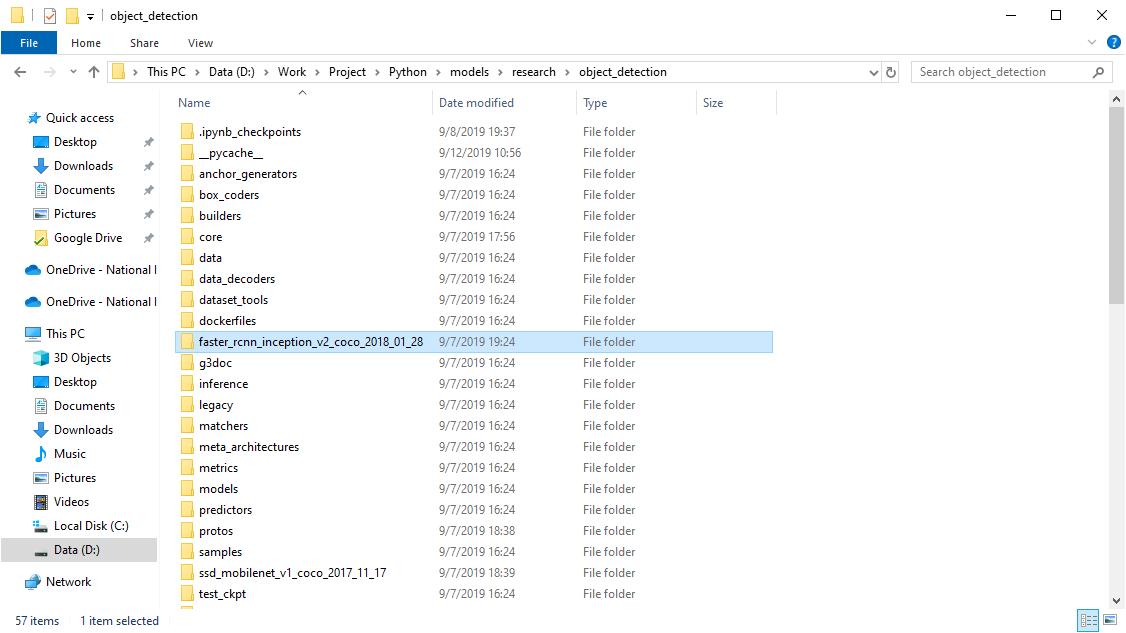
- ทำการแตกไฟล์ไว้ในโฟลเดอร์ object_detection/
- ทำการแก้ไขไฟล์ training/faster_rcnn_inception_v2_pets.config
...
model {
  faster_rcnn {
    num_classes: 4
...
train_config: {
  fine_tune_checkpoint: "C:/models/research/object_detection/faster_rcnn_inception_v2_coco_2018_01_28/model.ckpt"
...
train_input_reader: {
  tf_record_input_reader {
    input_path: "C:/models/research/object_detection/training/train.record"
  }
  label_map_path: "C:/models/research/object_detection/training/labelmap.pbtxt"
}
...
eval_input_reader: {
  tf_record_input_reader {
    input_path: "C:/models/research/object_detection/training/train.record"
  }
  label_map_path: "C:/models/research/object_detection/training/labelmap.pbtxt"
  shuffle: false
  num_readers: 1
}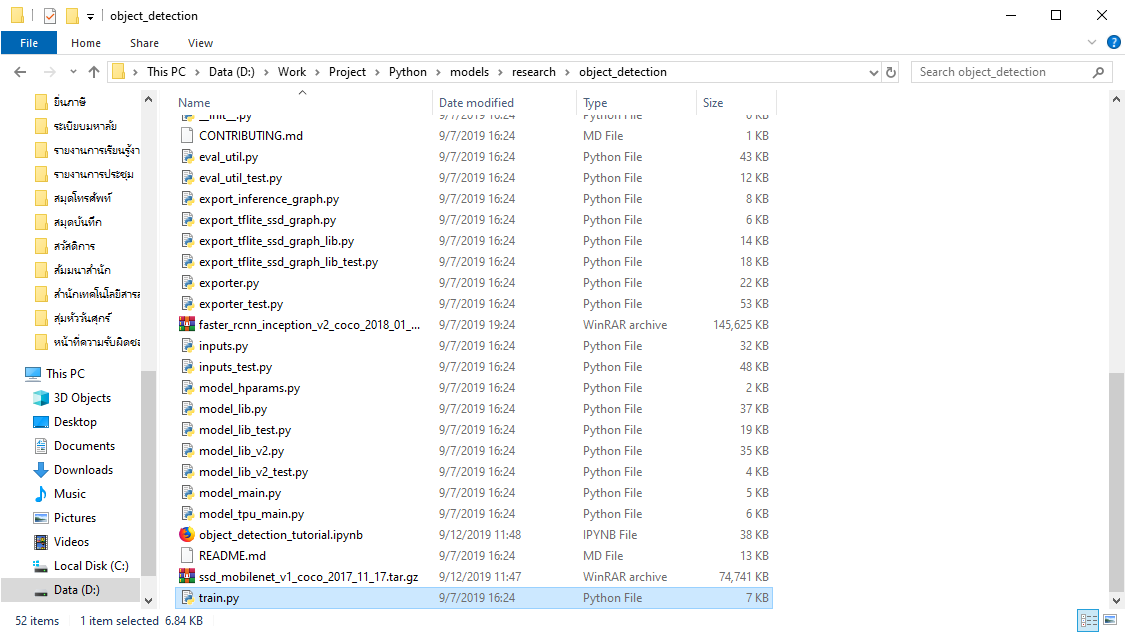
...- ทำการคัดลอกไฟล์ models/research/object_detection/legacy/train.py มาไว้ในโฟลเดอร์ models/research/object_detection/
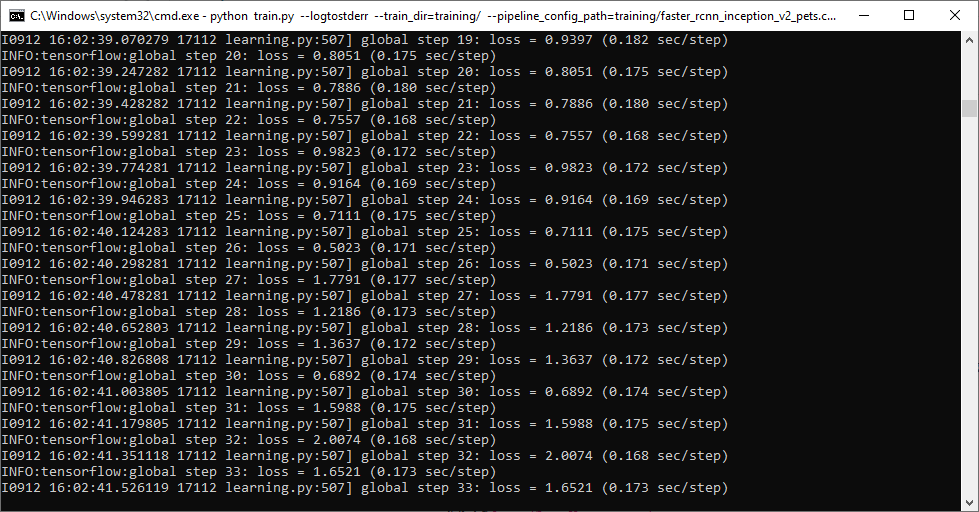
- ทำการรัน train.py
# C:\models\research\object_detection> python train.py ^
 --logtostderr ^
 --train_dir=training/ ^
--pipeline_config_path=training/faster_rcnn_inception_v2_pets.config- จะทำการ Train Model ด้วย Tensorflow
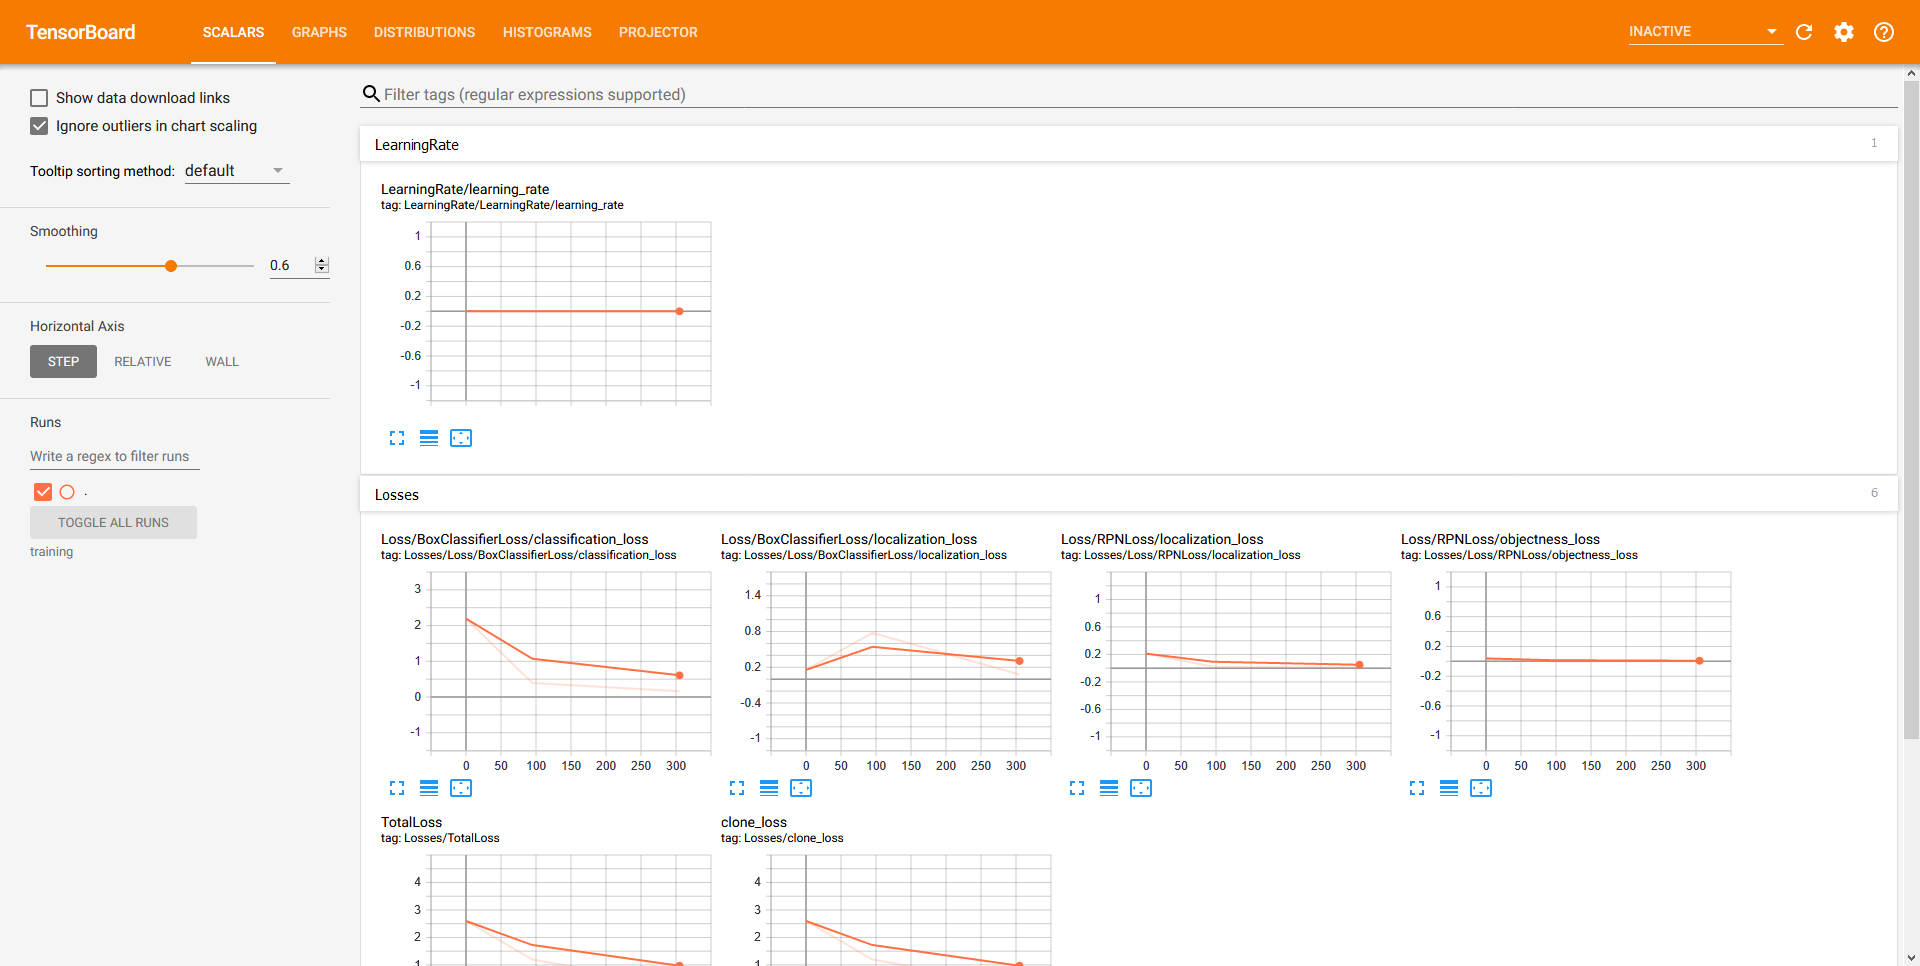
- ทำการตรวจสอบ Loss โดยใช้ Tensorboard เพื่ออ่านค่า ซึ่งจะถูกบันทึกทุก ๆ 5 นาที
# C:\models\research\object_detection> tensorboard --logdir=training- ลองเข้าไปที่ http://localhost:6006/
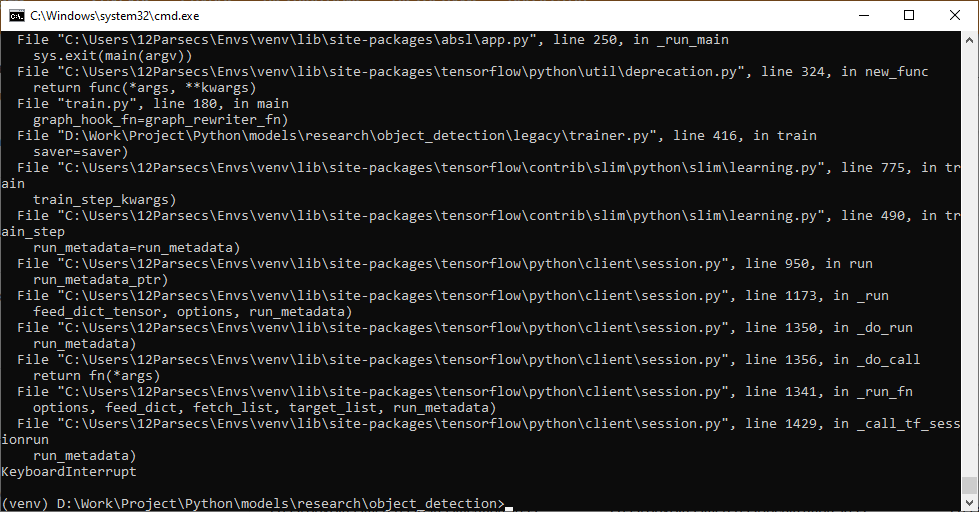
- ทำการ Train Model จนกระทั่งได้ Loss เป็นที่พอใจแล้ว ให้ทำการ Terminate เพื่อหยุดการทำงาน โดยการกด Ctrl+C
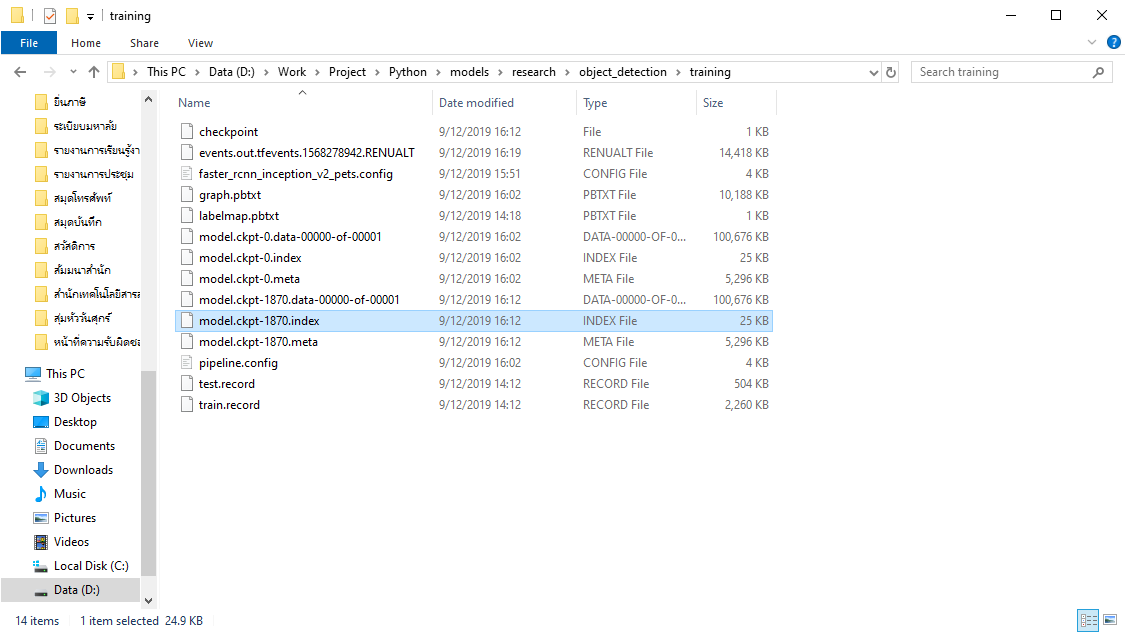
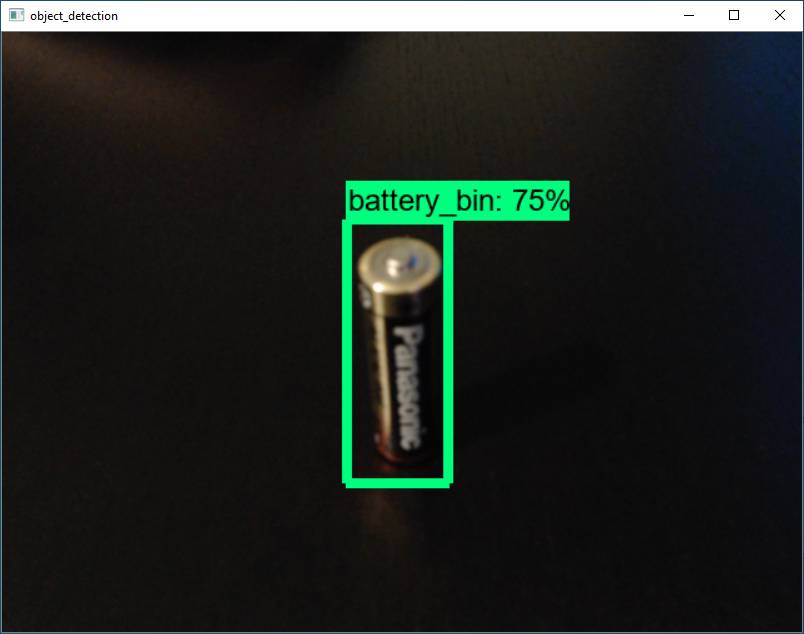
- ทำการตรวจสอบ Model ที่ได้จากการ Train
- ทำการ Export Inference Graph เพื่อนำไปใช้ Run Model
# C:\models\research\object_detection> python export_inference_graph.py ^
 --input_type image_tensor ^
 --pipeline_config_path training/faster_rcnn_inception_v2_pets.config ^
 --trained_checkpoint_prefix training/model.ckpt-latest ^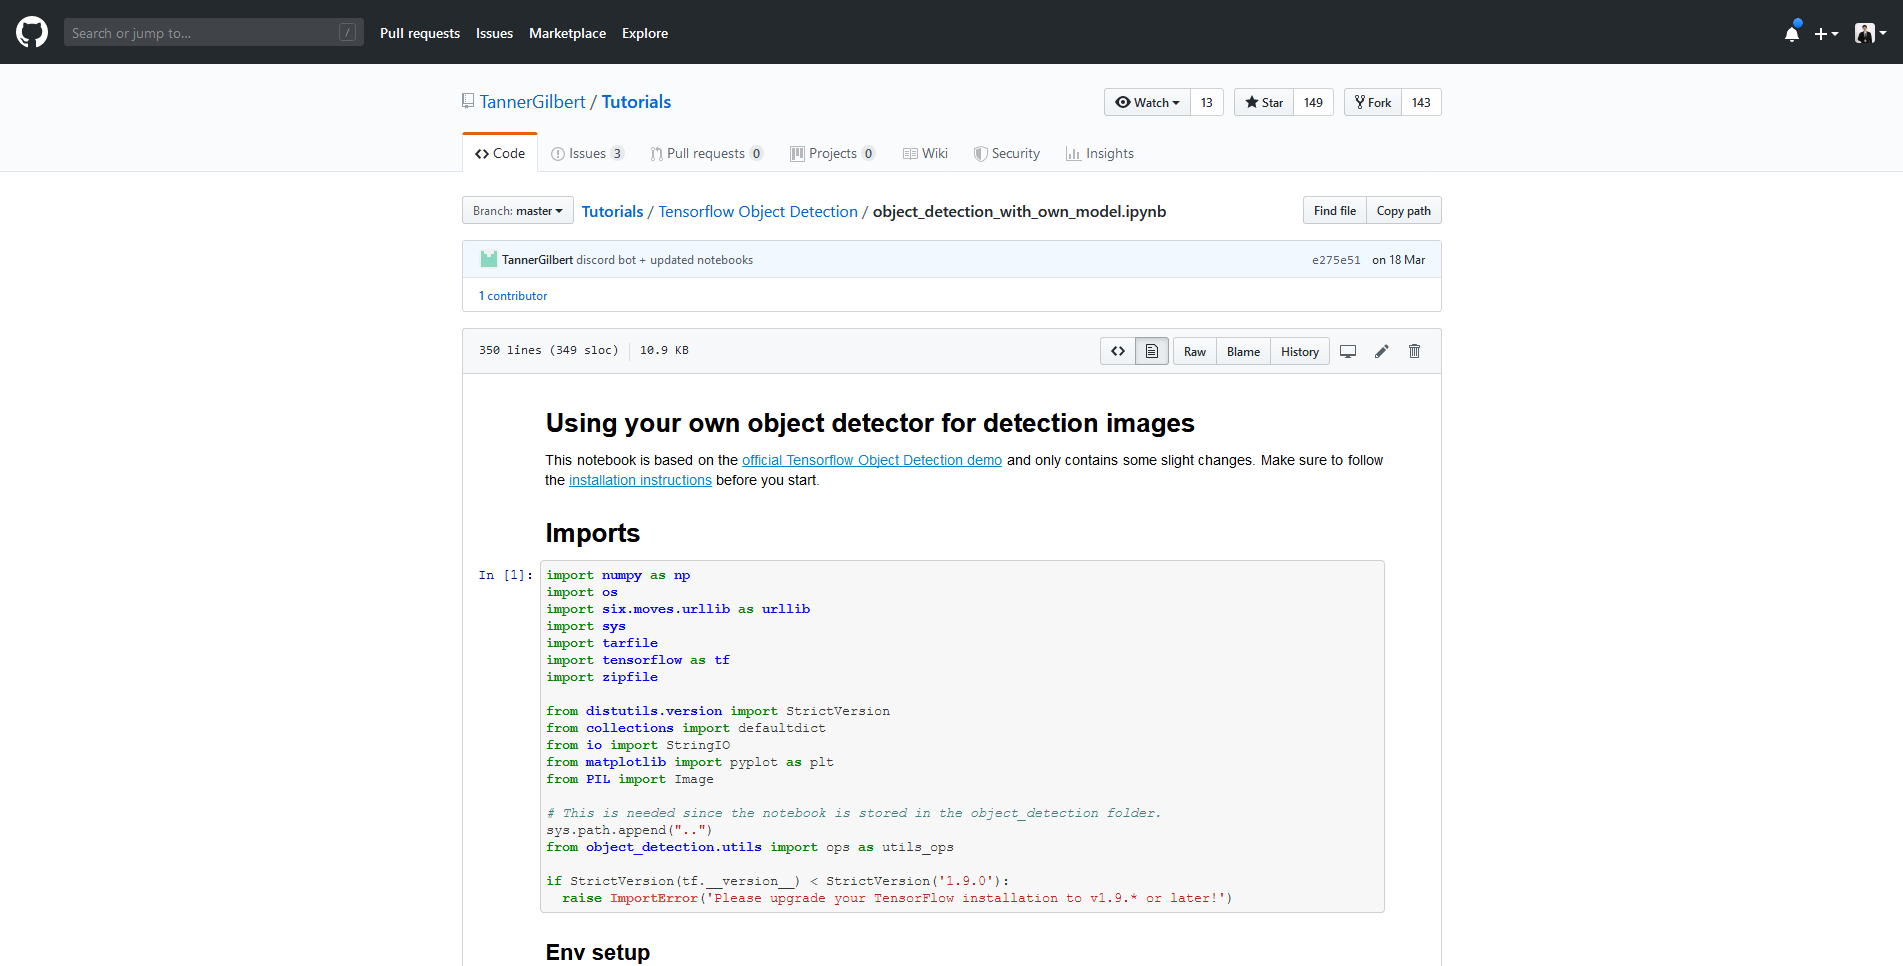
--output_directory inference_graph- ทำการดาวน์โหลดไฟล์ object_detection_with_own_model.ipynb
- ทำการรัน Jupyter Notebook
# C:\models\research\object_detection> jupyter notebook- จะทำการเปิด Jupyter Notebook ขึ้นมา แล้วคลิก object_detection_with_own_model.ipynb
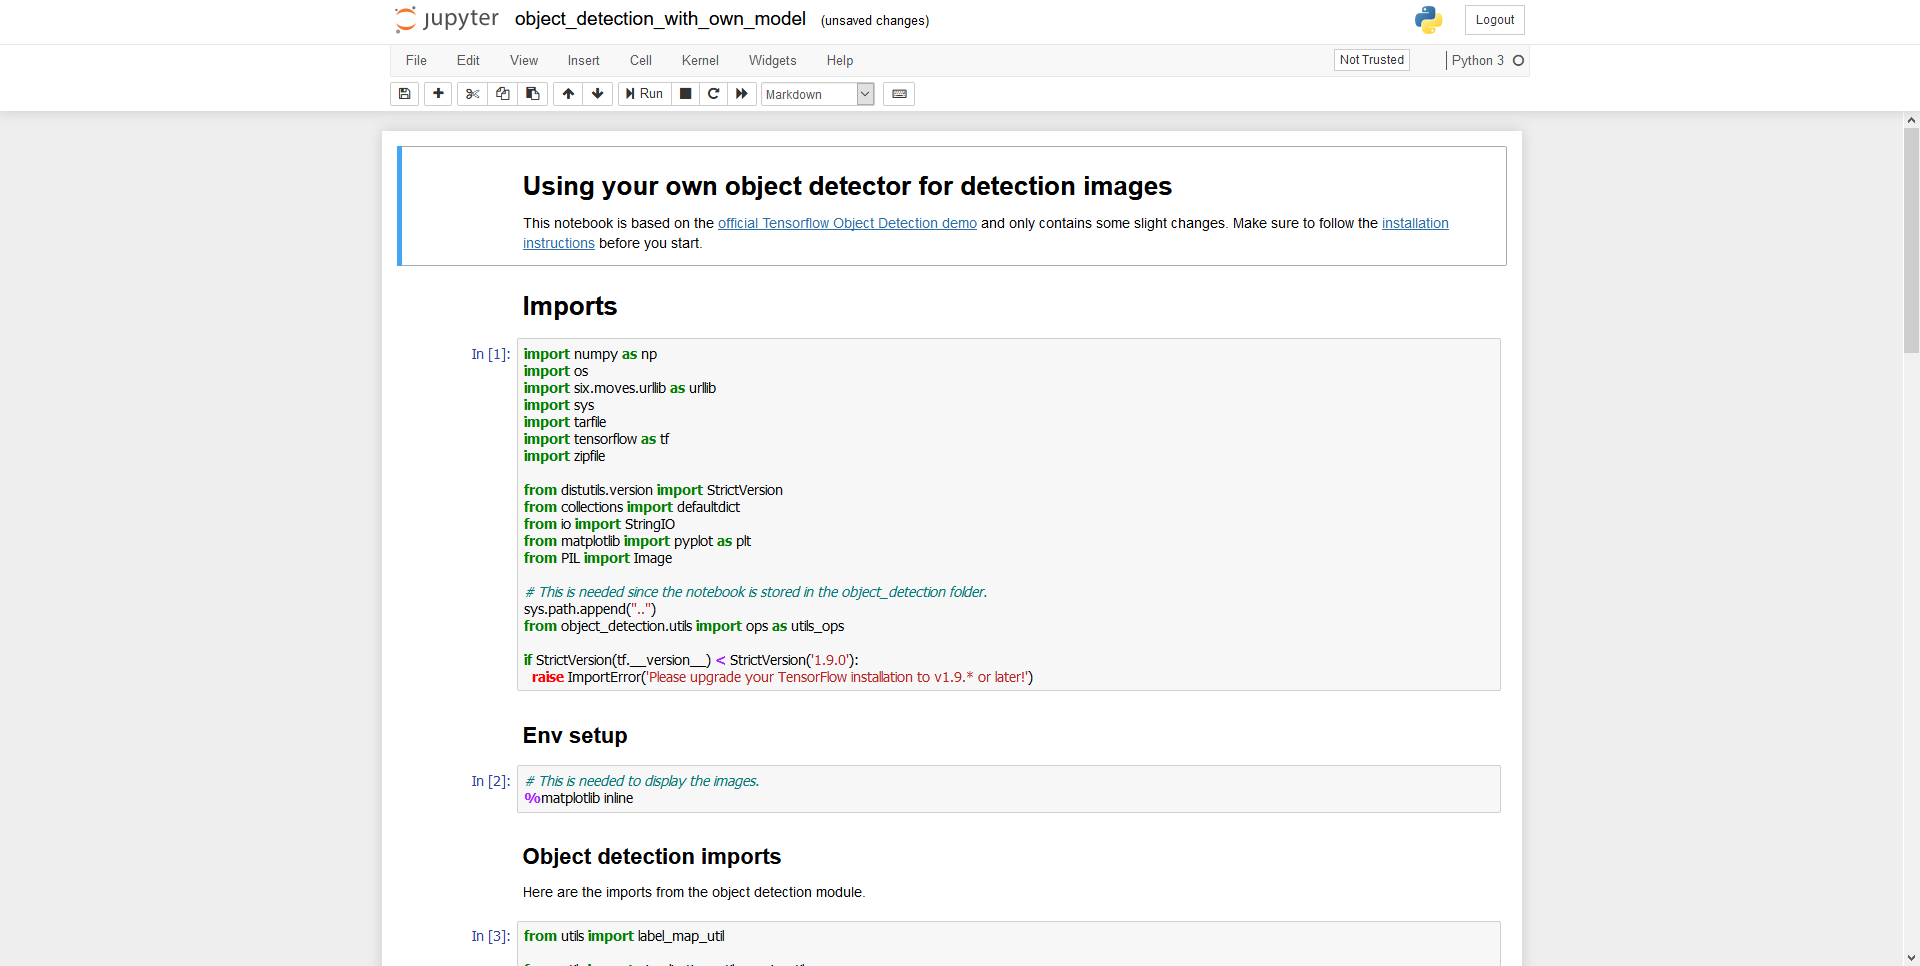
- ทำการแก้ไขไฟล์ object_detection_with_own_model.ipynb
MODEL_NAME = 'inference_graph'
PATH_TO_FROZEN_GRAPH = MODEL_NAME + '/frozen_inference_graph.pb'
PATH_TO_LABELS = 'training/labelmap.pbtxt'- คลิก Cell แล้วเลือก Run All
อ่านเพิ่มเติม : https://bit.ly/2WCjwof
Leave a Reply