หลังจากที่ได้ลองใช้ TMUX บน Windows Subsystem for Linux ( WSL ) กันไปแล้ว เราจะมาลองทำ Web Server บน WSL ทำให้เราไม่ต้อง Install Program ที่ใช้จำลองเครื่องเป็น Web Server บน Windows แต่ให้ทำการติดตั้งใน Windows Subsystem for Linux แทน
Requirement
- Enable Window Subsystem for Linux ( WSL )
- Install Ubuntu 18.04 LTS from Microsoft Store
Install
Step 1
- ทำการ Update และ Upgrade
# apt-get update && apt-get upgrade -y- ทำการติดตั้ง Apache
# apt-get install apache2 -y- ทำการ Start Service Apache จะเกิด Error ( APR_TCP_DEFER_ACCEPT )
# service apache2 start * Starting Apache httpd web server apache2
[Wed Sep 04 12:51:24.692788 2019] [core:warn] [pid 6240:tid 140563192941504] (92)Protocol not available: AH00076: Failed
to enable APR_TCP_DEFER_ACCEPT
*- ทำการแก้ไขไฟล์ /etc/apache2/apache2.conf
# vi /etc/apache2/apache2.confAcceptFilter http none
AcceptFilter https none- ทำการ Restart Service Apache
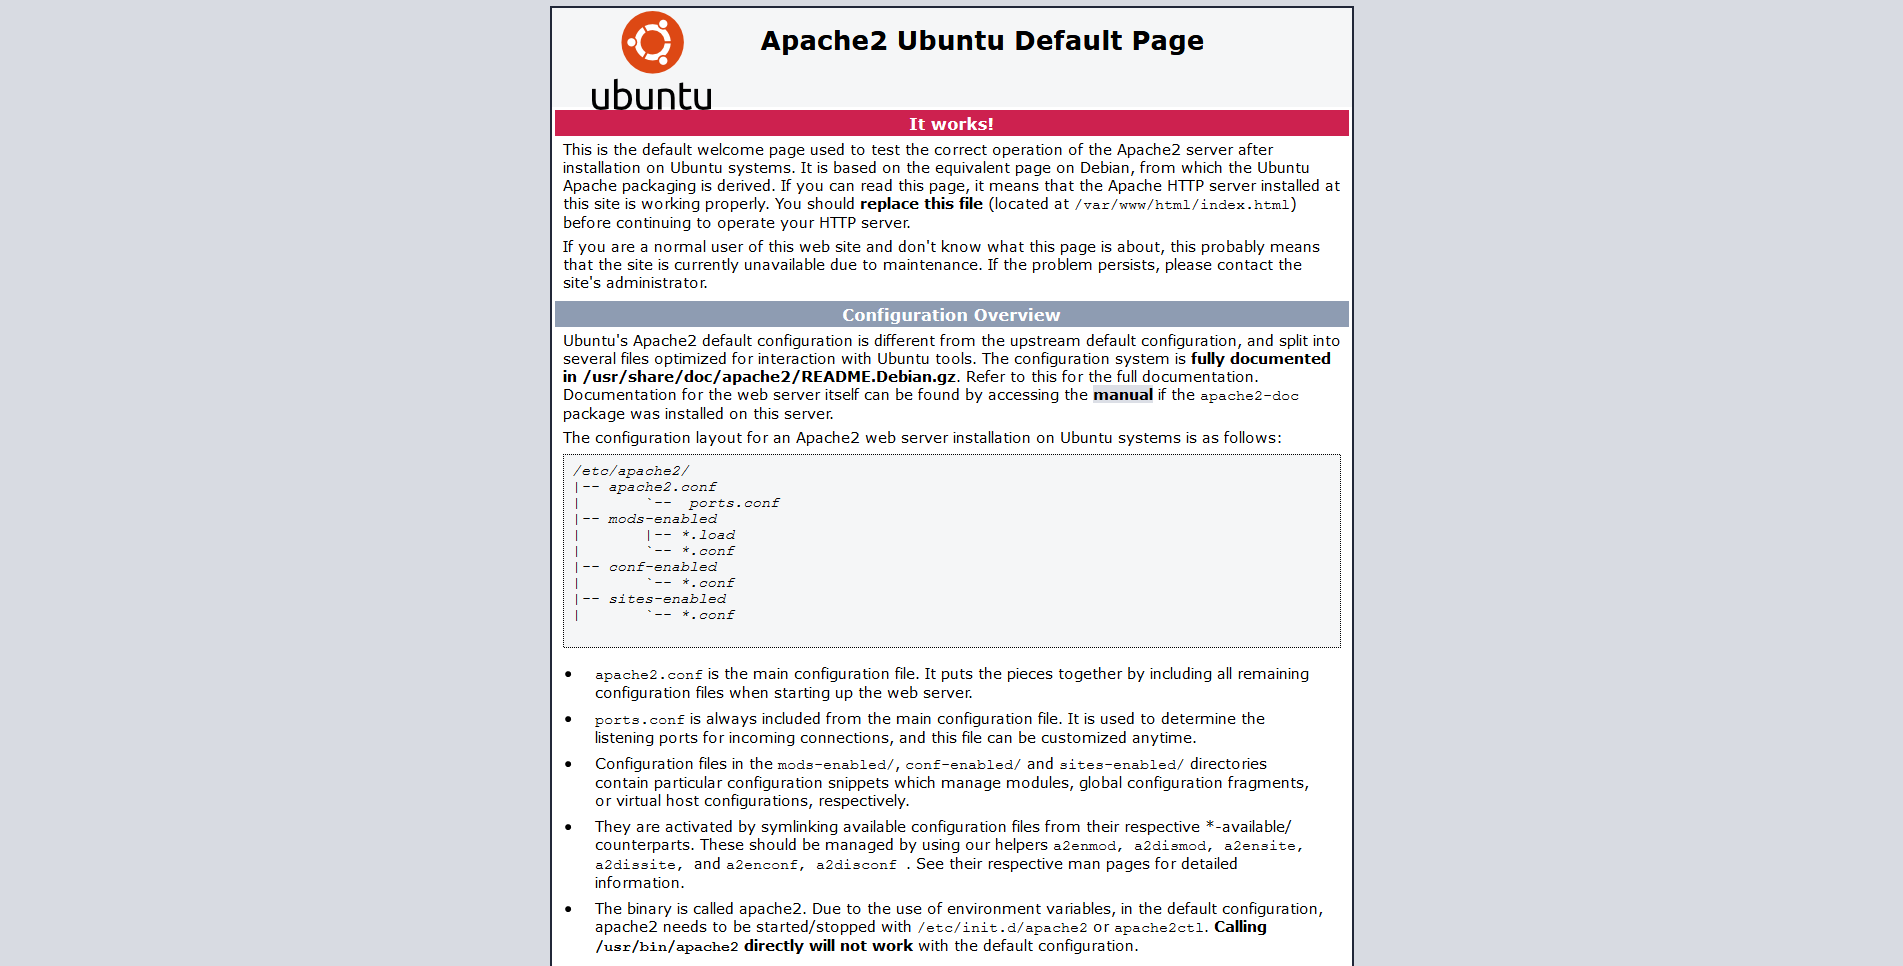
# service apache2 restart- ลองเข้าไปที่ http://localhost/
- อย่าลืมทำการ Enable Apache Module ที่ต้องใช้งาน เช่น mod_rewrite แล้วทำการ Restart Service Apache อีกครั้งหนึ่ง
# a2enmod rewrite
# service apache2 restart
Step 2
- ทำการติดตั้ง MySQL
# apt-get install mysql-server -y- ทำการแก้ไข Home Directory ของ User MySQL ซึ่งโดย Default จะไม่ได้กำหนดไว้ หากทำการ Start Service MySQL จะขึ้น Error ( No directory, logging in with HOME=/ )
# usermod -d /var/lib/mysql mysql- ทำการ Start Service MySQL
# service mysql start- ทำการกำหนด Configuration MySQL
# mysql_secure_installationSecuring the MySQL server deployment.
Connecting to MySQL using a blank password.
VALIDATE PASSWORD PLUGIN can be used to test passwords
and improve security. It checks the strength of password
and allows the users to set only those passwords which are
secure enough. Would you like to setup VALIDATE PASSWORD plugin?
Press y|Y for Yes, any other key for No: yThere are three levels of password validation policy:
LOW Length >= 8
MEDIUM Length >= 8, numeric, mixed case, and special characters
STRONG Length >= 8, numeric, mixed case, special characters and dictionary file
Please enter 0 = LOW, 1 = MEDIUM and 2 = STRONG: 1Please set the password for root here.
New password: ********
Re-enter new password: ********Estimated strength of the password: 100
Do you wish to continue with the password provided?(Press y|Y for Yes, any other key for No) : yBy default, a MySQL installation has an anonymous user,
allowing anyone to log into MySQL without having to have
a user account created for them. This is intended only for
testing, and to make the installation go a bit smoother.
You should remove them before moving into a production
environment.
Remove anonymous users? (Press y|Y for Yes, any other key for No) : ySuccess.
Normally, root should only be allowed to connect from
'localhost'. This ensures that someone cannot guess at
the root password from the network.
Disallow root login remotely? (Press y|Y for Yes, any other key for No) : y - Dropping test database...
Success.
- Removing privileges on test database...
Success.
Reloading the privilege tables will ensure that all changes
made so far will take effect immediately.
Reload privilege tables now? (Press y|Y for Yes, any other key for No) : ySuccess.
All done!- ลองทำการ Login MySQL
# mysql -u root -pEnter password:
mysql>Step 3
- ทำการติดตั้ง PHP
# apt-get install libapache2-mod-php php php-curl php-gd php-mbstring php-mcrypt php-mysql php-xml php-zip -y- ทำการ Enable PHP Module
# phpenmod mcrypt
# phpenmod mbstring- ทำการแก้ไขไฟล์ /etc/apache2/apache2.conf
# vi /etc/apache2/apache2.conf<Directory /mnt/d/Work/WSL/www/>
Options Indexes FollowSymLinks
AllowOverride None
Require all granted
</Directory>- ทำการแก้ไขไฟล์ /etc/apache2/sites-enabled/000-default.conf
# vi /etc/apache2/sites-enabled/000-default.confDocumentRoot /mnt/d/Work/WSL/www- ทำการ Restart Service Apache
# service apache2 restart- ทำการสร้างไฟล์ /mnt/d/Work/WSL/phpinfo.php
# vi /mnt/d/Work/WSL/phpinfo.php<?php
phpinfo();
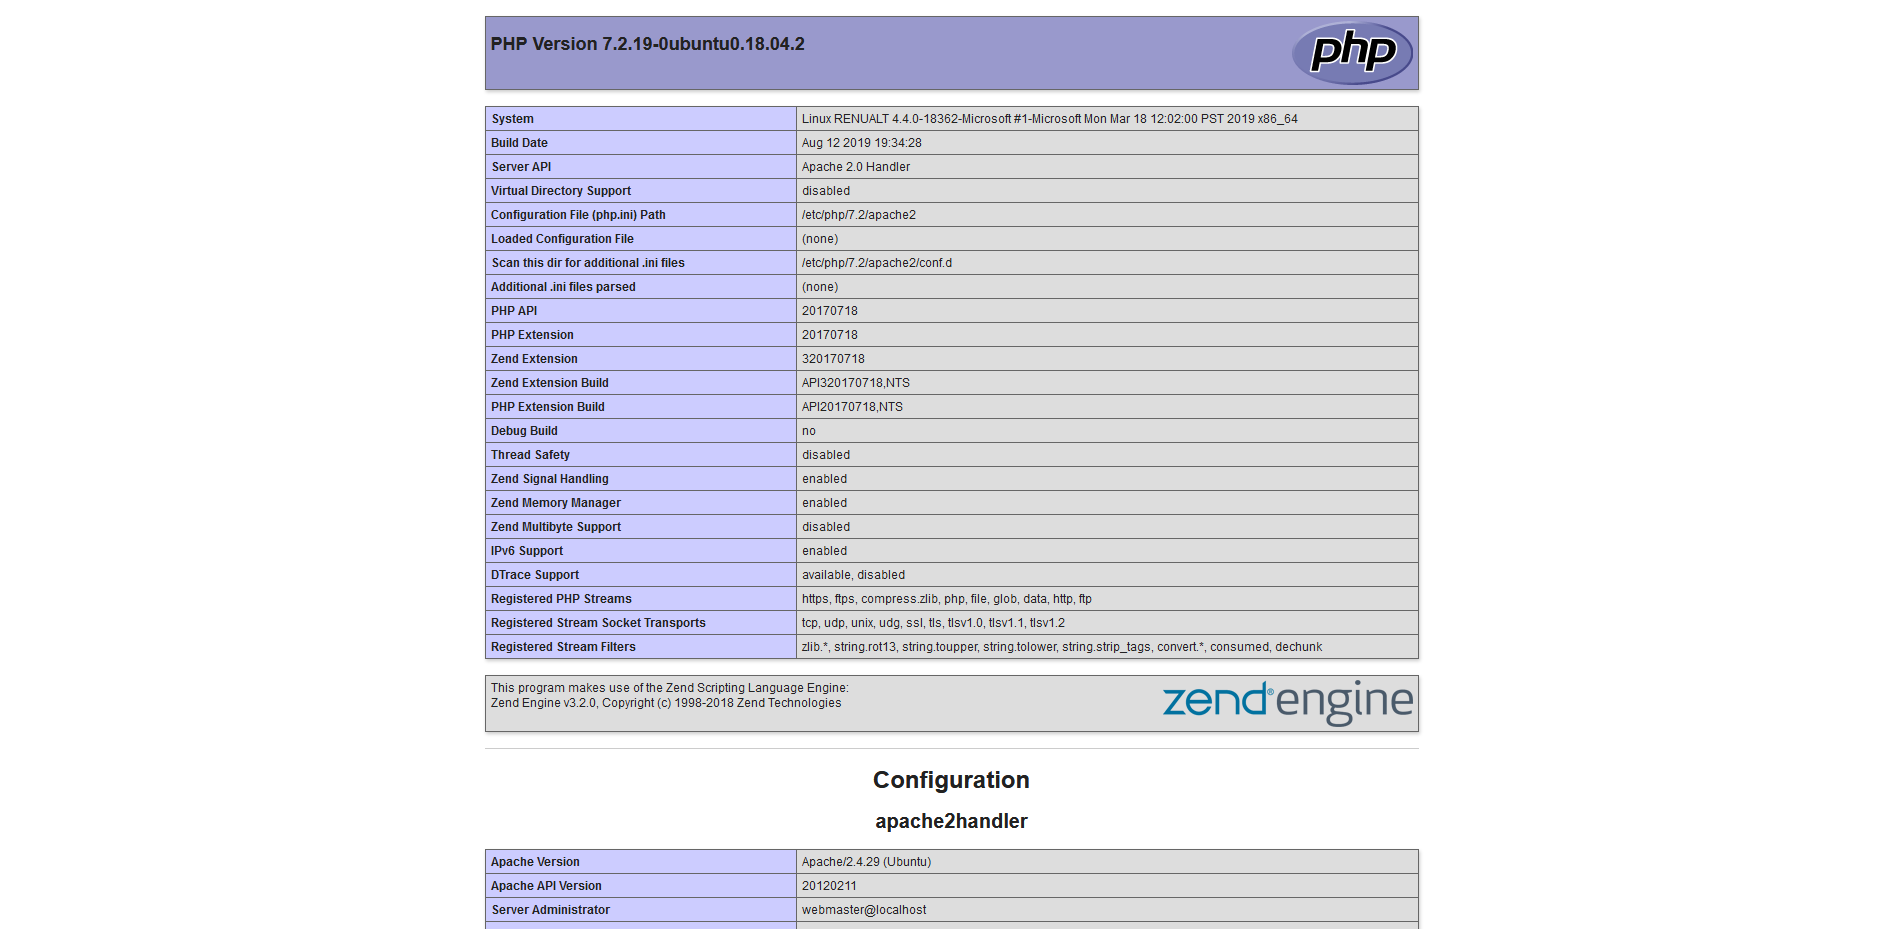
?>- ลองเข้าไปที่ http://localhost/phpinfo.php
Step 4
- ทำการติดตั้ง phpMyAdmin
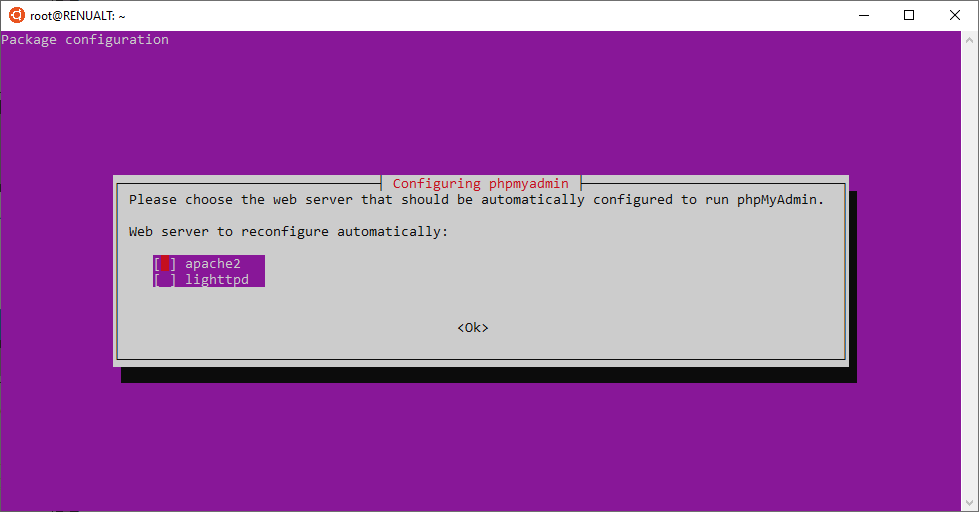
# apt-get install phpmyadmin -y- เลือก Apache2 แล้วคลิก OK
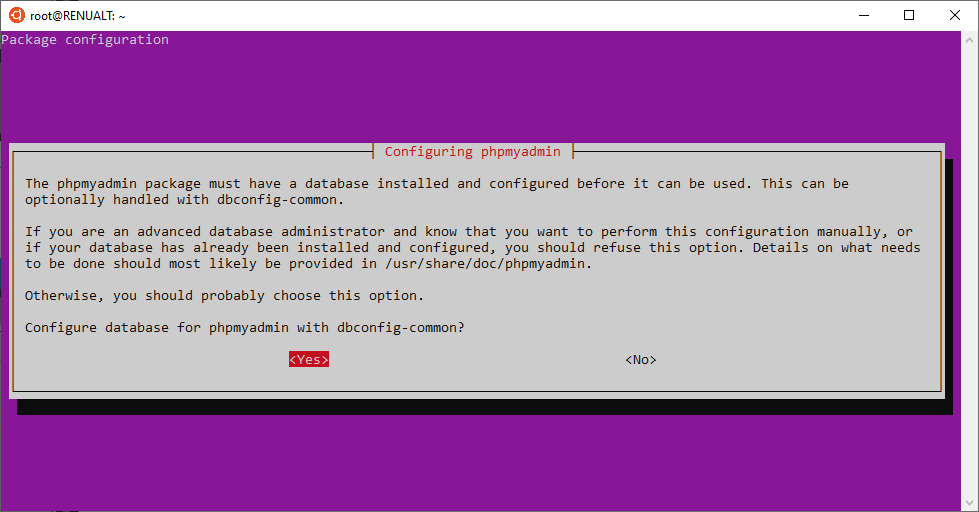
- คลิก Yes
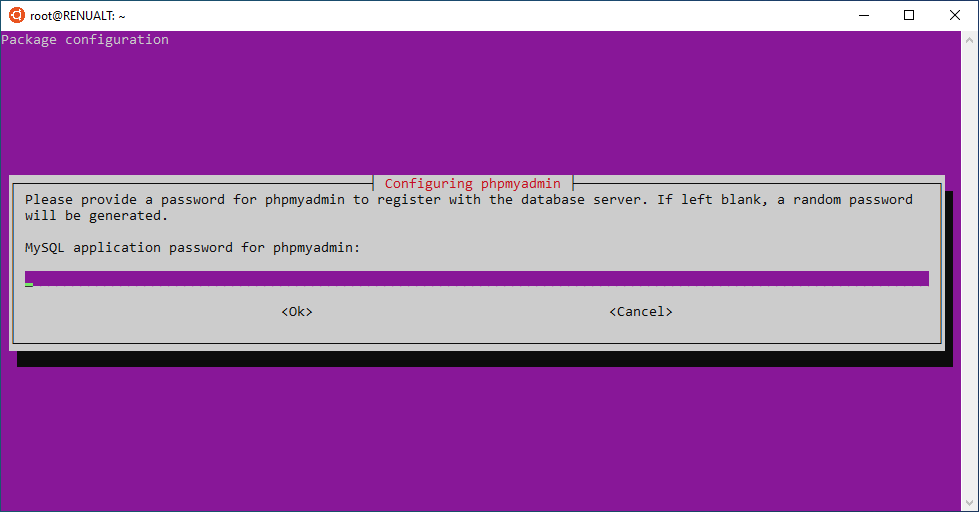
- ทำการกรอก MySQL Password แล้วคลิก OK
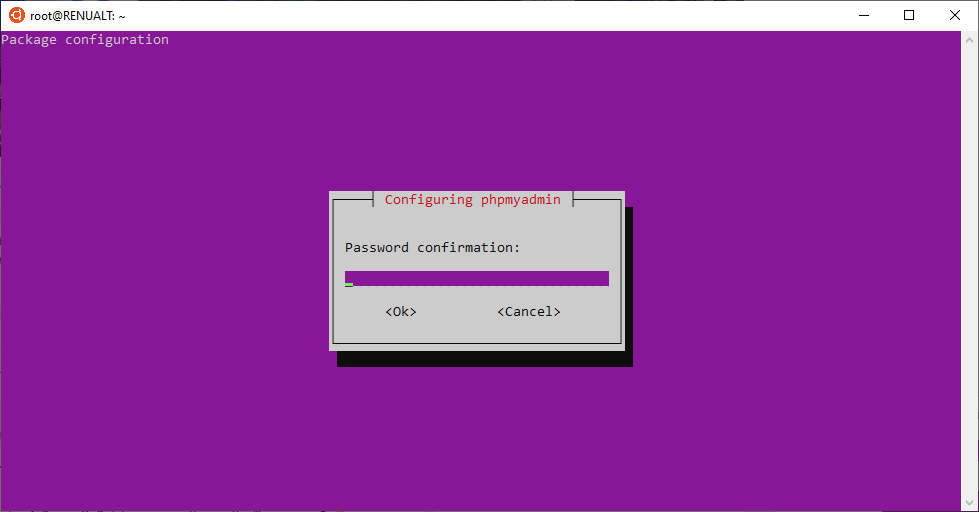
- ทำการกรอก MySQL Password อีกครั้ง แล้วคลิก OK
- ทำการแก้ไขไฟล์ /etc/apache2/apache2.conf
# vi /etc/apache2/apache2.conf# Include phpmyadmin configuration
Include /etc/phpmyadmin/apache.conf- ทำการ Restart Service Apache
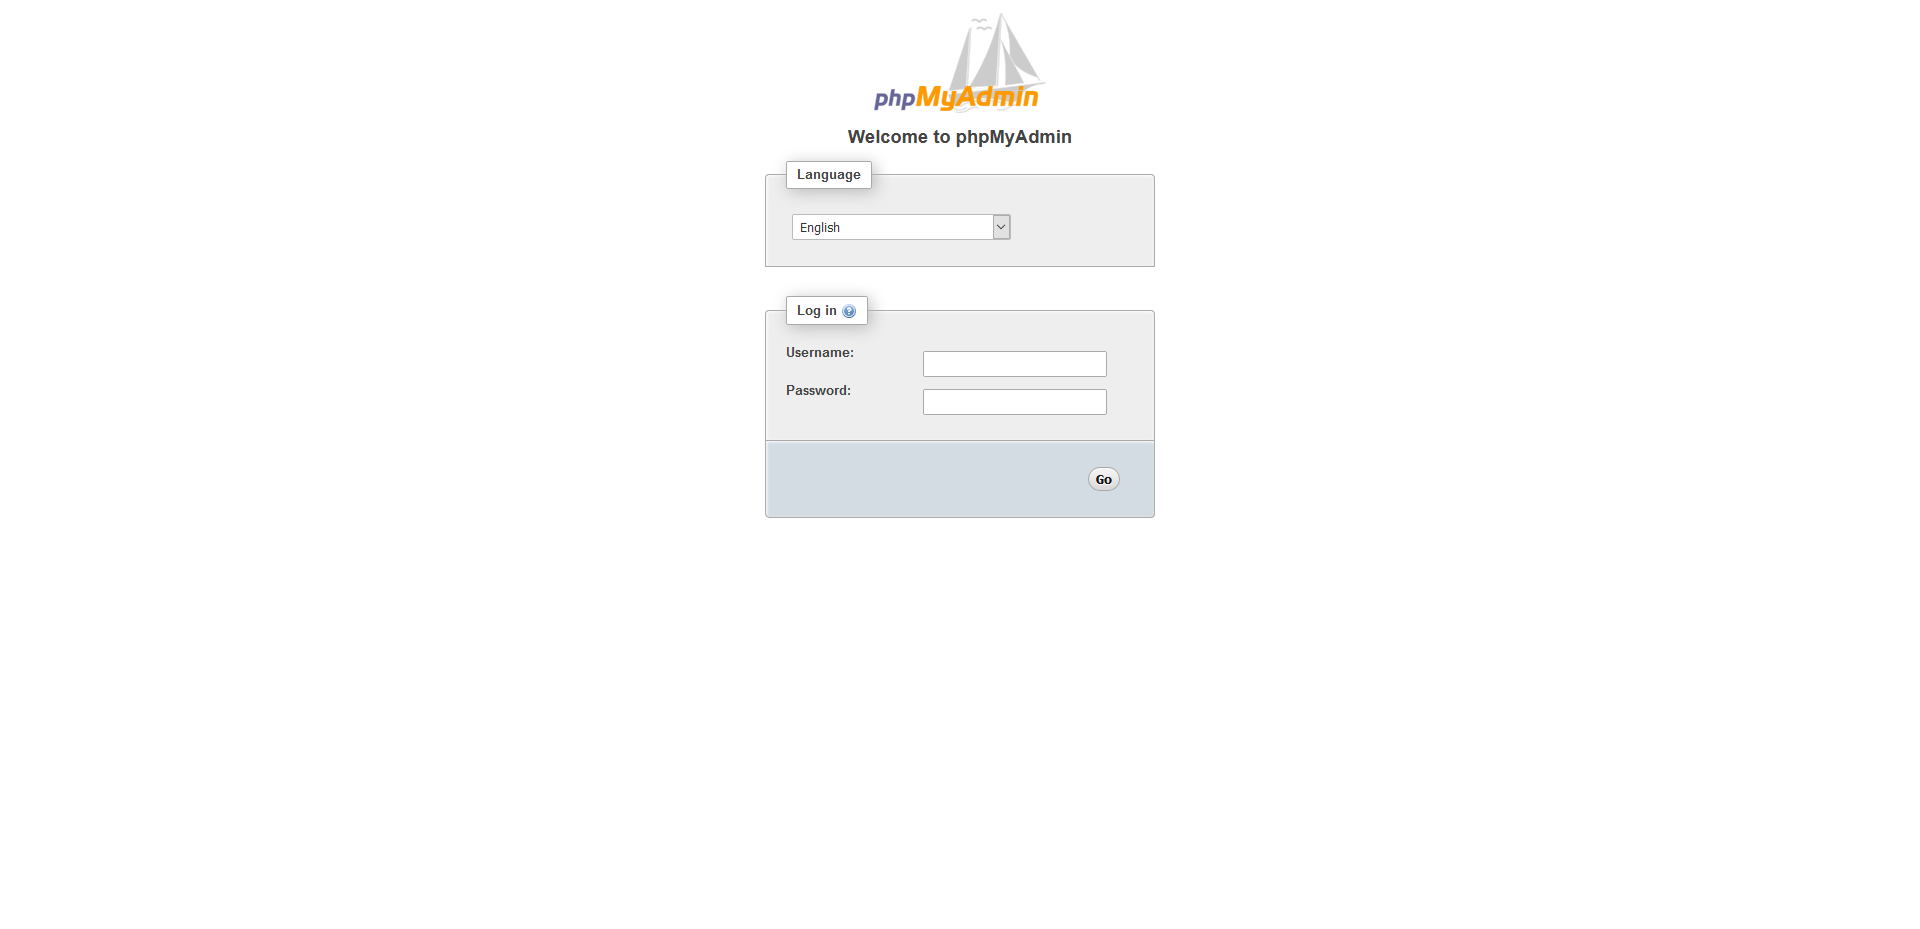
# service apache2 restart- ลองเข้าไปที่ http://localhost/phpmyadmin/
อ่านเพิ่มเติม : https://bit.ly/2lXnt9N
Leave a Reply